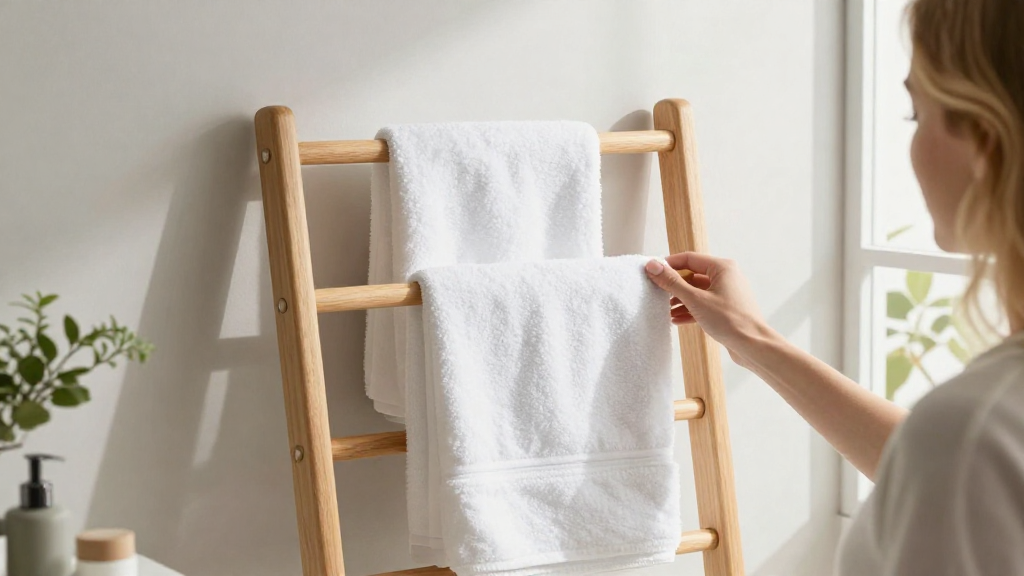
Are you thinking about adding more storage solutions to your bathroom?
Creating a DIY wooden towel rack can be an easy and rewarding project.
Why Choose a DIY Wooden Towel Rack?
Creating a DIY wooden towel rack not only enhances the beauty of your bathroom but it also:
- Saves money: Instead of purchasing a costly towel rack from a store, you can make one yourself at a fraction of the price.
- Showcases creativity: You can personalize the design, color, and finish to suit your bathroom’s decor.
- Provides functionality: A well-placed towel rack can help organize towels and keep your bathroom looking neat.
What Materials Do You Need for Your DIY Wooden Towel Rack?
To create your DIY wooden towel rack, you need a few materials that are easily available. Here’s a list to help you get started:
- Wood: Choose a sturdy wood type such as pine, oak, or cedar.
- Wood glue: This will help in holding the pieces together.
- Screws: For extra support and durability, use wood screws.
- Sandpaper: This is essential for smoothening the edges and surfaces.
- Paint or wood stain (optional): To add a personal touch and complement your bathroom’s theme.
- Drill: For making holes for screws.
- Saw: For cutting wood to the desired length.
- Clamps: These are useful for holding the pieces together while the glue dries.
How Do You Design Your DIY Wooden Towel Rack?
Designing your DIY wooden towel rack can be straightforward. Consider the following steps:
-
Decide on the size.
– Measure the available wall space in your bathroom.
– Determine how many towels it should hold. -
Choose the style.
– A minimalist design with simple lines works well for modern bathrooms.
– A rustic style can enhance traditional or farmhouse decors. -
Sketch your design.
– Draw a schematic to visualize the dimensions and arrangement of the rack.
How to Assemble Your DIY Wooden Towel Rack?
Once you have your materials ready and your design sketched out, it’s time to assemble your DIY wooden towel rack. Follow these steps:
Step 1: Cut the Wood
- Using a saw, cut your wood pieces according to your design. For a basic towel rack, you’ll need:
- 1 horizontal top bar: This will hold the towels.
- 2 vertical side supports: These will attach to the wall.
- 1 or 2 horizontal shelves (optional): If you want additional space for toiletries or other accessories.
Step 2: Sand the Edges
- Use sandpaper to smoothen all edges and surfaces.
- This helps to prevent splinters and gives a polished look.
Step 3: Assemble the Rack
- Start by attaching the vertical side supports to the horizontal top bar using wood glue.
- Use screws for additional strength by drilling them through the top bar into the side supports.
- If you opted for shelves, follow the same method to attach them between the side supports.
Step 4: Secure the Frame
- Ensure everything is tight and secure.
- Use clamps to hold the frame in place while the glue sets.
Step 5: Finish the Surface
- If you want to paint or stain your DIY wooden towel rack, now is the time.
- Apply a coat of paint or wood stain that complements your bathroom decor.
- Let it dry completely before proceeding.
Step 6: Install the Towel Rack
- Determine the placement of your towel rack on the wall.
- Use a stud finder to locate the best spots to drill holes for the screws.
- Once aligned, attach the towel rack to the wall using screws for secure anchoring.
How to Maintain Your DIY Wooden Towel Rack?
Now that you have completed your DIY wooden towel rack, it’s essential to maintain it for longevity. Here are some tips:
- Regular Cleaning: Wipe down the towel rack with a damp cloth to remove dust and moisture.
- Check for Loose Screws: Periodically check the screws and tighten them as needed to ensure sturdiness.
- Avoid Excessive Moisture: Try to keep the rack in a well-ventilated area of the bathroom to prevent mildew and decay.
What Are Some Creative Variations of DIY Wooden Towel Racks?
Once you have mastered the basic design, consider experimenting with variations of your DIY wooden towel rack. Here are some ideas:
- Multi-Tiered Racks: Build a taller rack with multiple levels for different towel sizes.
- Freestanding Designs: Instead of a wall-mounted version, create a freestanding towel rack that can be moved around easily.
- Incorporate Hooks: Add hooks on the sides for hanging robes or smaller towels.
- Combining Materials: Pair wood with metal or wicker for a unique rustic look.
Conclusion
Building your own DIY wooden towel rack is not just a fun project, but it also provides a functional storage solution for your bathroom.
By following the steps and tips provided in this article, you can create a beautiful and personalized space to hang your towels.
So gather your materials, unleash your creativity, and transform your bathroom with a custom towel rack that reflects your unique style!