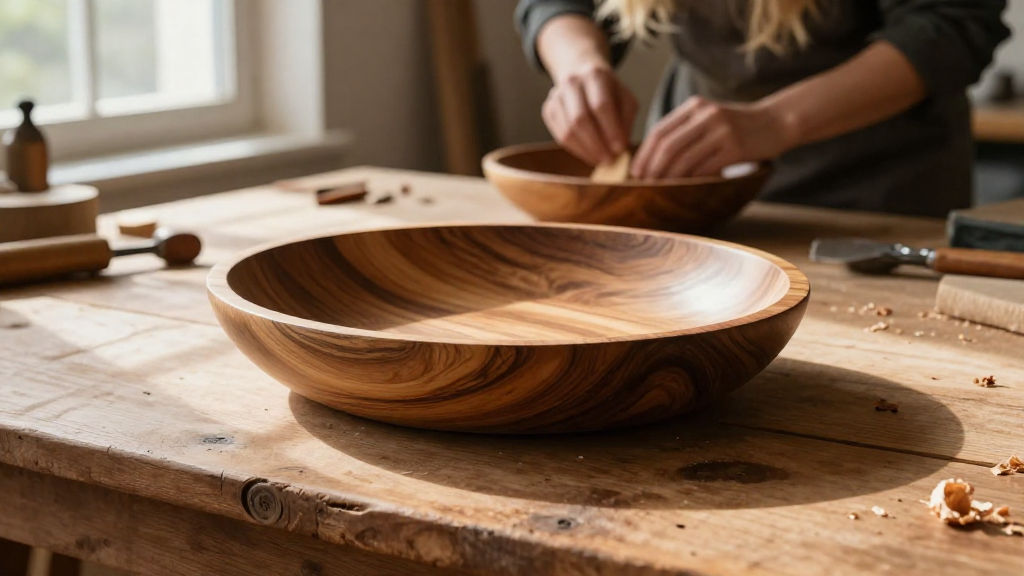
Creating a segmented wooden bowl can be a rewarding woodworking project that combines art, precision, and craftsmanship.
In this article, we will explore how to make a segmented wood bowl step-by-step, providing tips and insights for both beginners and experienced woodworkers.
What Are the Materials Needed?
To successfully embark on your journey of how to make a segmented wood bowl, you’ll need some essential materials and tools:
- Wood: Choose hardwoods like maple, walnut, cherry, or oak for durability and aesthetic appeal.
- Wood Glue: A strong, high-quality wood glue will ensure the segments stay bonded.
- Clamps: A variety of clamps will help you secure the bowl while the glue dries.
- Saw: A table saw or miter saw is crucial for cutting precise segment angles.
- Sandpaper: Various grits (80 to 220) will help smooth the surface and prepare for finishing.
- Finishing Oils or Sealants: These will protect your finished bowl and enhance its natural beauty.
How Do You Prepare the Wood for Segmenting?
Before you jump into making your segmented wooden bowl, preparation is key. Here’s how to prepare the wood:
Select Your Design
- Decide on the design of your bowl.
- Segmented bowls can have simple or intricate patterns, so sketch your ideas on paper first.
Cut the Segments
- Measure and Mark: Measure the desired height and width of your bowl.
- Cut the Segments: Use a miter saw to cut the wood into segments.
– For a basic segmented bowl, each segment can be about 1-2 inches wide.
– For a more complex design, consider using contrasting wood colors or grains.
Dry Fit the Segments
- Assemble Without Glue: Place the segments together without glue to visualize the bowl’s shape.
- Make any necessary adjustments, ensuring that they fit snugly together.
How Do You Glue the Segments Together?
Gluing the segments is a crucial step in how to make a segmented wood bowl. Here’s how to do it correctly:
- Apply Wood Glue: Apply an even layer of wood glue to the edges of the segments.
- Assemble Segments: Carefully place the segments together in the desired arrangement.
- Use Clamps: Use clamps to hold the segments tightly together. Leave them clamped for a few hours or until the glue fully dries.
How Do You Shape the Bowl?
Now that your segments are glued together and dried, it’s time to shape your bowl.
Turn the Bowl
- Mount on Lathe: If you have a lathe, mount your glued segments carefully.
- Shape the Exterior: Start shaping the outside of the bowl first using a bowl gouge.
– Work from the center outwards to create a smooth curve. - Shape the Interior: After shaping the exterior, flip the bowl around to shape the interior, creating a well-defined bowl shape.
Sanding
- Start with Coarse Grit: Begin with an 80-grit sandpaper to smooth out the surface.
- Increase Grit Gradually: Move up to 150-grit, then 220-grit for a finer finish.
- Final Touch: Ensure all corners and edges are smooth to prevent splinters.
What Finishing Options Are Available?
Choosing a finish for your segmented wooden bowl is essential for durability and visual appeal. Here are some popular options:
- Oil Finishes:
– Tung Oil or Linseed Oil penetrate the wood and give a warm, rich color. - Polyurethane:
– Provides a protective, waterproof layer but can create a plastic-like finish if applied too thickly. - Shellac:
– Adds a beautiful, golden hue but is less durable than oil or polyurethane.
Application Tips
- Apply your chosen finish with a soft cloth or brush.
- Allow each coat to dry thoroughly before sanding lightly and adding another coat.
- Aim for 3-5 coats for a durable and attractive finish.
How Do You Care for Your Segmented Wooden Bowl?
To maintain the beauty of your segmented wooden bowl, follow these care tips:
- Hand Wash Only: Avoid the dishwasher to protect the wood and finish.
- Use Mild Soap: Clean your bowl with a mild dish soap and warm water.
- Dry Immediately: Thoroughly dry with a clean cloth to prevent wood warping or cracking.
- Reapply Finish Periodically: If the finish starts to dull, reapply a thin coat of oil or wood conditioner.
Why Choose a Segmented Wooden Bowl?
Making a segmented wooden bowl is not just about the final product. It’s about the process. Here are some benefits:
- Creative Expression: Allows for interesting designs and patterns.
- Craftsmanship: Enhances your woodworking skills and introduces you to new techniques.
- Eco-Friendly: Using sustainably sourced woods can contribute to eco-friendly practices.
- Functional Art: The bowls can be used practically in the kitchen or displayed as decorative pieces.
Conclusion
In conclusion, learning how to make a segmented wood bowl is an engaging project that combines creativity with woodworking skills.
With the right materials, techniques, and care, your finished bowl can be a timeless piece of art or a delightful gift.
So gather your materials, follow the steps outlined in this guide, and let your creativity flow!