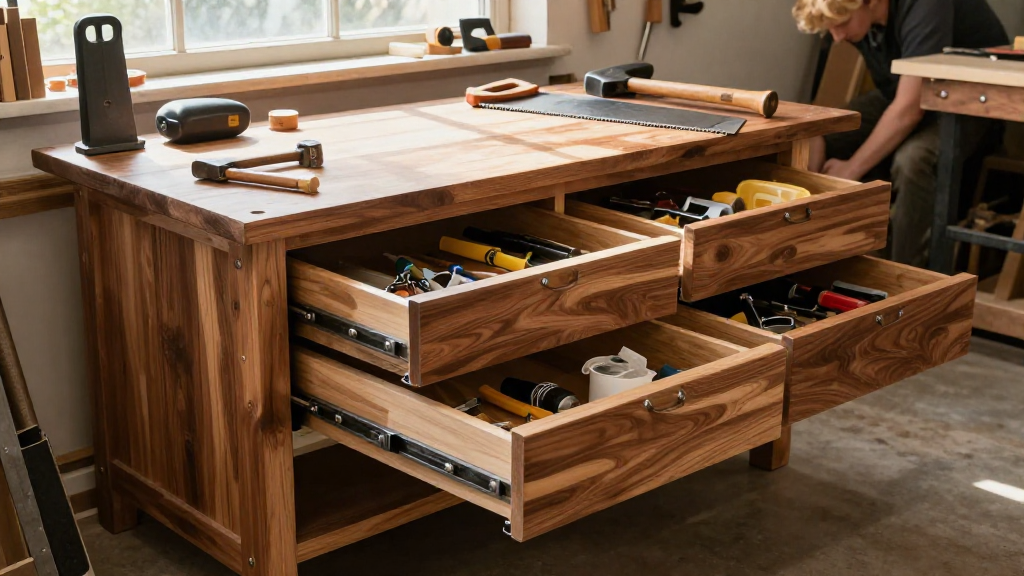
Building a workbench with drawers is a rewarding project that combines functionality with craftsmanship.
Not only does a well-built workbench provide a solid surface for various tasks, but the integrated drawers ensure that your tools and materials stay organized.
In this article, we will guide you through the steps to create your own workbench with drawers.
Why Should You Build a Workbench with Drawers?
When considering how to build a workbench with integrated drawers, you might wonder why this is significant. Here are a few key benefits:
- Increased Organization: Drawers help keep your tools and materials accessible and organized.
- Space-Saving: Integrated drawers reduce the need for separate storage units, freeing up valuable workshop space.
- Customization: Building your own workbench allows you to tailor it to your specific needs and preferences.
What Materials Do You Need for Building a Workbench with Drawers?
Before diving into the construction process, gather the necessary materials. Here’s a comprehensive list:
- Plywood or MDF: For the workbench top.
- 2×4 or 2×6 lumber: To build the frame and legs.
- Drawer slides: For the integrated drawers.
- Wood screws: To fasten the pieces together.
- Wood glue: To reinforce your construction.
- Wood finish: To protect and enhance the wood surface.
- Saw: A circular saw or miter saw will work.
- Drill: For making holes for screws and drawer slides.
- Measuring tape: To ensure accurate dimensions.
- Sandpaper: For smoothing edges.
How Do You Measure for Your Workbench?
Accurate measurements are crucial when building a workbench with drawers. Here’s how to get it right:
-
Determine the Size:
– Decide on the overall dimensions based on your workspace and usage.
– A standard workbench is typically 24-36 inches deep and 48-96 inches wide. -
Plan the Height:
– The ideal workbench height usually ranges from 28 to 36 inches, depending on your height and usage. -
Drawer Size:
– Plan for the size and number of drawers to ensure they fit within your workbench design.
What Steps Are Involved in Building the Workbench Frame?
Building the frame is a foundational step when learning how to build a workbench with drawers. Follow these steps:
-
Cut the Lumber:
– Cut the 2×4 or 2×6 lumber into the necessary lengths for the frame and legs. -
Assemble the Frame:
– Create a rectangular frame using wood screws.
– Use corner braces if you want extra stability. -
Attach the Legs:
– Construct a stable leg frame.
– Attach each leg securely to the rectangular frame.
How to Install the Workbench Top?
The workbench top is crucial for durability and usability. Here’s how to attach it:
-
Cut the Plywood or MDF:
– Ensure the top fits securely over your frame. -
Attach the Top:
– Use wood screws to fasten the top to the frame below.
– Ensure it’s well-supported and flush with the edges.
What About Building the Drawers?
Now comes the fun part: building the integrated drawers. Here’s how to go about it:
-
Measure for Drawers:
– Plan the dimensions based on your needs and the available space within the workbench. -
Cut the Drawer Pieces:
– Use plywood to cut the front, back, sides, and bottom of each drawer. -
Assemble the Drawers:
– Use wood glue and screws to construct each drawer.
– Sand edges for smooth operation. -
Install Drawer Slides:
– Attach the slides to the sides of the drawers and the inside of the frame.
– Make sure they are level for easy opening and closing.
How Do You Finish Your Workbench?
Finishing touches make your workbench not only functional but aesthetically pleasing. Follow these steps:
-
Sand the Surfaces:
– Use sandpaper to smooth out any rough edges or surfaces. -
Apply Wood Finish:
– Use a wood stain or sealant to protect the surface.
– Follow the manufacturer’s instructions for best results. -
Final Assembly:
– Ensure drawers are operating smoothly.
– Check for any loose screws or unsteady areas.
What Are Some Tips for Successful Bench Building?
To ensure your project turns out exactly as planned, here are some valuable tips:
- Take Your Time: Rushing can lead to mistakes. Allow yourself ample time to measure, cut, and assemble.
- Check for Level: Ensure your workbench is level before final assembly. Use a level tool to check all sides.
- Customize: Add additional features like a pegboard for tools, a vice for clamping, or shelves for extra storage.
Conclusion: What Have You Learned About Building a Workbench with Drawers?
Building a workbench with drawers is a fulfilling project that enhances the efficiency of your workspace.
By following the guidelines laid out in this article, you can create a custom solution to store and organize all your tools and materials.
Whether you are a beginner or a seasoned woodworker, this project allows you to flex your building skills while creating something perfectly suited to your needs.
So grab your tools and materials, because working on this project will not only enhance your workshop but also bring you one step closer to a well-organized and enjoyable workspace!