Wondering how to make a French cleat wall for your garage or workshop?
You’ve come to the right place!
In this article, we’ll cover everything you need to know about creating this efficient tool storage solution.
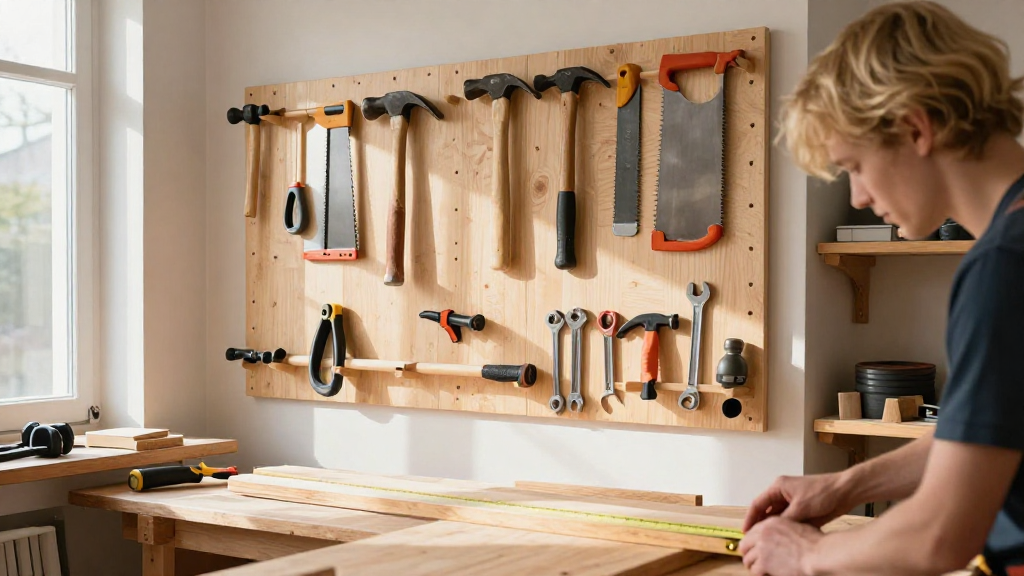
A French cleat wall is an innovative and practical method for organizing your tools and maximizing vertical space in any workshop or garage.
Let’s dive into the step-by-step process of building your own French cleat wall.
What is a French Cleat Wall?
A French cleat wall consists of a series of interlocking wooden strips that allow you to hang tools, storage bins, and other equipment securely.
This system is favored by DIYers for its versatility and simplicity.
By learning how to make a French cleat wall, you can customize your setup to fit your specific needs.
Why Choose a French Cleat Wall?
Before we dive into the steps of building a French cleat wall, let’s discuss some benefits:
- Versatile Storage: Easily swap out tools and accessories.
- Space Efficiency: Maximize wall space by utilizing vertical storage.
- Customizable: Tailor it to fit your needs and workspace.
- Easy to Build: Requires minimal tools and is beginner-friendly.
With that in mind, it’s time to get started.
What Materials Do You Need?
Gather the materials needed to create your French cleat wall:
- Plywood:
– 3⁄4” thick plywood for cleat strips.
– 1/2” or 3/4” plywood for the backer board.
– - Stud Finder: To locate the wall studs.
- Wood Screws: 1⅝” screws for attaching cleats.
- Wood Glue: For securing the cleats together.
- Circular Saw: To cut your plywood to size.
- Level: To ensure cleats are installed straight.
- Drill: For creating the screw holes.
With your materials in hand, let’s move on to the construction steps.
How Do You Build the Wall?
Step 1: Prepare Your Work Area
Begin by choosing the wall space for your French cleat wall.
Make sure it’s clear and accessible.
Step 2: Measure and Cut Plywood
Next, you’ll need to measure and cut your plywood:
- Backer Board: Cut a piece of plywood to your desired size for the backer.
- Cleat Strips: Cut additional strips that are 3-5 inches wide.
To achieve the angled cleat, cut each strip at a 45-degree angle along the length.
Tip: For a typical garage wall, consider making the backer board around 4 feet wide and 8 feet tall.
Step 3: Install the Backer Board
With the backer board cut, it’s time to attach it to the wall:
– Use the stud finder to locate wall studs.
- Position the backer board so it’s level.
- Drill pilot holes through the backer into the studs and secure it with wood screws.
Step 4: Attach the Cleat Strips
Once the backer board is firmly in place:
- Start at the top and attach the first cleat strip.
- Position it so that the angled side is facing up.
- Secure it with screws, ensuring it’s level.
Continue to add cleat strips vertically, spacing them judiciously based on the tools you plan to store.
Tip: Keep the spacing between the strips around 12 inches apart for versatility.
How Do You Create Tool Holders?
Step 5: Build Tool Holders
Now that you have your French cleat wall framework:
– Use scraps of plywood to create matching cleat pieces for your tools.
- Cut pieces with a matching 45-degree angle on one side to fit into the wall cleats.
Tool Holder Ideas:
- Simple Shelves: For smaller items.
- Tool Hooks: For hanging wrenches and pliers.
- Baskets: For easy-to-access screws and other small hardware.
Step 6: Hang Your Tools
- Slide your newly created tool holders onto the cleat strips.
- Make adjustments as needed.
Personalize your French cleat wall storage to meet your specific needs.
How to Organize Tools Effectively?
Step 7: Organize Your Tools
With a functional French cleat wall set up, it’s time to get organized:
-
Group Similar Tools:
– Keep like tools together for easy access. -
Utilize Labels:
– Label spaces for quick identification of each tool. -
Consider Accessibility:
– Place tools you use frequently at eye level. -
Leave Space for Growth:
– Leave room for adding more tools and accessories later.
Are There Any Maintenance Tips?
Step 8: Maintain Your French Cleat Wall
To keep your French cleat wall functional:
- Regularly check for loose screws.
- Keep it tidy by returning tools to their designated places.
- Reassess your organization as your tool collection grows.
Conclusion
Learning how to make a French cleat wall is a fantastic project for anyone looking to streamline their tool storage.
With a few materials, some basic woodworking skills, and a little creativity, you can create a customized and efficient storage solution that will keep your tools easily accessible and organized.
Start planning your French cleat wall today, and take your workshop organization to the next level!
Whether you’re a seasoned DIYer or just starting out, this project is both fulfilling and practical.
Enjoy the benefits of having a well-organized space, and never hunt for a tool again!