If you’re wondering how to apply a shellac finish to wood, you’ve come to the right place!
A shellac finish offers a beautiful, natural shine to wood while providing some protection against moisture.
In this article, we will guide you through each step of the process, ensuring you understand how to achieve a flawless shellac finish on your DIY projects.
What Materials Do You Need for Shellac Application?
Before diving into the specifics of how to apply a shellac finish, let’s gather our materials.
- Shellac (choose between scraped, flakes, or pre-mixed liquid)
- Application tools:
– Natural bristle brush
– Foam brush
– Lint-free cloth
– Spray gun (optional) - Sandpaper of varied grits (120, 220, and 320)
- Clean cloths for dust removal
- Denatured alcohol (for thinning and clean-up)
- Drop cloths or newspaper to protect your working area
- Protective gear: gloves, goggles, and a mask (particularly important in poorly ventilated areas)
By having these materials ready, you’ll be well-equipped to learn how to apply a shellac finish.
How Do You Prepare the Wood Before Shellac Application?
Preparation is crucial when it comes to how to apply a shellac finish.
Follow these steps:
-
Choose Your Wood:
– Whether it’s pine, oak, or cherry, know your wood as different species absorb shellac differently. -
Surface Preparation:
– Start by sanding the wood.
– Use 120-grit sandpaper followed by 220-grit for a smooth, even surface.
– Ensure you sand along the grain to prevent scratches. -
Dust Removal:
– After sanding, use a clean cloth or tack cloth to remove any dust.
– Important: Any dust particles will disrupt the smoothness of the shellac finish. -
Condition If Needed:
– If using softer woods, consider applying a wood conditioner to ensure even absorption of the shellac.
Proper preparation is essential for a stunning shellac finish.
How to Apply Shellac Finish: What Are the Steps?
Now that your wood is prepared, let’s discuss how to apply a shellac finish.
Step 1: Choose Your Shellac
Shellac is available in different types:
- Dewaxed shellac: Ideal for a transparent finish, especially good if you plan to use another topcoat.
- Waxed shellac: Offers a warm glow but can dull the surface if not careful.
For beginners, a pre-mixed shellac might simplify the process since you’ll avoid the mixing hassle.
Step 2: Thin the Shellac
If you’re using flakes, mix them with denatured alcohol according to the package instructions.
Generally, a 2 lb cut is common.
For pre-mixed, thinnning may not be necessary unless instructed:
– If you are using liquid shellac, you might choose to thin it slightly with denatured alcohol to improve flow.
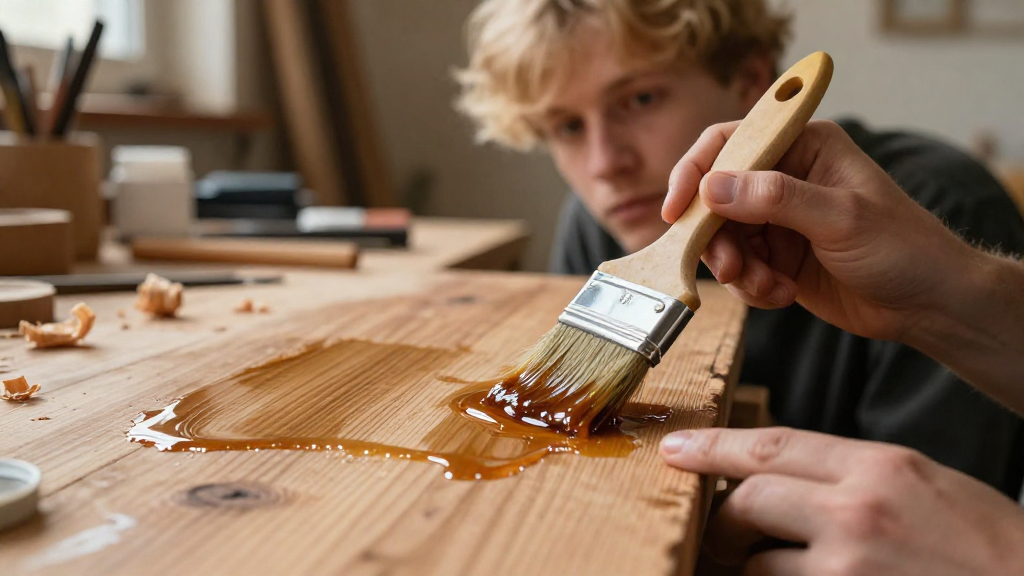
Step 3: Apply the Shellac
-
Using a Brush:
– Dip your brush in the shellac and remove excess.
– Start at one corner and work in even strokes along the grain.
– Maintain a wet edge to prevent lap marks. -
Using a Foam Brush:
– Foam brushes can work well, especially for larger surfaces.
– Follow similar techniques by applying in smooth strokes along the grain. -
Using Spray Gun:
– If you prefer, you can use a spray gun for an even application.
– Adjust compressor settings for even coverage and always practice on a scrap piece. -
Avoid Puddles:
– Ensure you don’t leave puddles of shellac, as they can create a rough surface.
Step 4: Drying Time
Allow the shellac to dry completely before applying a second coat.
Facing temperatures around 70°F, expect about 30 minutes drying time.
In humid conditions, increase drying time accordingly.
Step 5: Sanding Between Coats
- After the first coat dries, lightly sand the surface with 320-grit sandpaper.
- Use a clean cloth to remove dust before applying the next coat.
Repeating this process (typically 2-4 coats) will build depth and protection.
How to Finish Shellac Application: What’s Next?
What should you do after your final coat?
- Final Sanding:
– Lightly sand with a fine grit (400-600) then clean the dust off. - Polishing:
– If desired, you can buff the surface with a soft cloth to achieve a higher gloss. - Curing:
– Allow the shellac to cure fully. This can take up to two weeks for complete hardness.
When Should You Use Shellac Finish?
Knowing when to opt for shellac can elevate your woodworking skills.
Shellac is great for:
- Furniture: Provides a natural, glossy finish.
- Musical Instruments: Used for its aesthetic and resonant quality.
- Craft Projects: Ideal for wood that benefits from a lightweight finish.
However, avoid using shellac for items exposed to heavy moisture unless you apply an additional waterproof sealant.
Conclusion: Mastering How to Apply a Shellac Finish
Now that you know how to apply a shellac finish to wood, you can add stunning beauty to your projects!
With careful preparation, application, and attention to detail, your wood will have that rich, glossy finish that showcases its natural beauty.
Remember, practice makes perfect; don’t be discouraged if your first few attempts aren’t flawless.
As you gain experience, you’ll become adept at how to apply a shellac finish and achieve that gorgeous, professional look each time.
Take the plunge into finishing your wood projects with confidence, and enjoy the results!