Knowing how to seal wood before staining is crucial to achieve a long-lasting, beautiful finish on your wood projects. Sealing wood before staining protects it, enhances its natural beauty, and ensures that the stain goes on evenly.
Why Should You Seal Wood Before Staining?
Sealing wood is an essential step in the preparation process for various woodworking projects. Here are three main reasons to seal wood before applying stain:
-
Protection from Moisture:
Sealing helps prevent water and other environmental elements from penetrating the wood, which can lead to warping, splitting, or decay. -
Improved Color Consistency:
Different wood species absorb stain differently. By sealing the wood, you create a uniform surface that results in a more consistent color when the stain is applied. -
Enhanced Finish:
A sealant can improve the overall look of the wood by providing a smoother finish and allowing the natural grain to shine.
What Materials Do You Need to Seal Wood Before Staining?
To successfully seal wood before staining, gather these essential materials:
- Wood Sealer: Choose a high-quality product compatible with your type of wood.
- Sandpaper: Use 120-grit or finer for best results.
- Clean Cloths: For application and removing dust.
- Brush or Foam Applicator: For even application of the sealer.
- Mineral Spirits or Water: Depending on the type of sealer used for cleanup.
How Do You Prepare Wood for Sealing?
Proper preparation is vital when considering how to seal wood before staining. Here’s how to prepare your wood:
-
Choose the Right Wood:
Different wood types, like oak, pine, or cedar, each have unique properties. Choose a sealer suitable for your specific wood type. -
Sand the Surface:
– Start with coarse sandpaper (like 80-grit) if needed to smooth rough areas.
– Progress to finer sandpaper (120-grit or higher) for a smooth finish.
Sanding creates tiny grooves in the wood that help the sealer adhere effectively.
- Clean Dust Thoroughly:
Use a clean cloth to wipe down the sanded surface to remove any dust particles, ensuring a clear path for the sealer to bond with the wood.
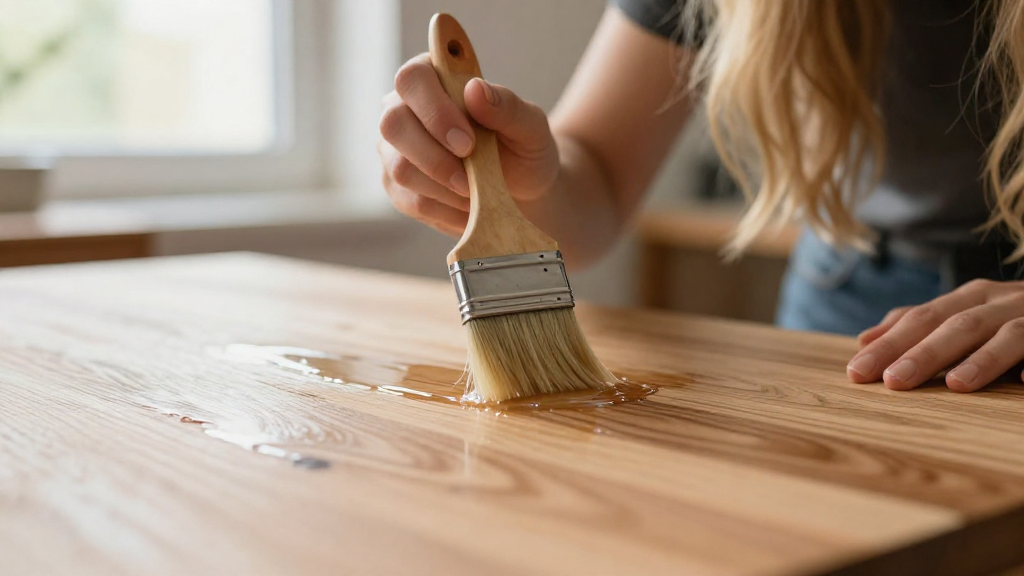
How to Apply Wood Sealer Before Staining?
When you’ve prepared your wood, it’s time to seal it. Follow these steps on how to seal wood before staining:
-
Stir the Sealer:
Stir the sealer gently to ensure it’s well-mixed. Avoid shaking, as bubbles can form and impair application. -
Test the Sealer:
Before applying it to the entire piece, test it on a small, inconspicuous area to see how the wood reacts. -
Apply with a Brush or Foam Applicator:
– Use long, even strokes.
– Apply in the direction of the wood grain. -
Allow to Soak and Wipe Off Excess:
– After applying, allow the sealer to soak into the wood for 5-15 minutes, depending on the product instructions.
– Use a clean cloth to wipe off any excess sealer. -
Let It Dry:
Follow the manufacturer’s instructions for drying time. Generally, allow at least 1-2 hours before checking if the surface feels dry. -
Sand Again:
Once the first coat is dry, lightly sand the surface with fine sandpaper (like 220-grit) to create a smooth finish before applying additional coats. -
Apply Additional Coats:
For better protection, apply a second coat of sealer following the same process. A third coat may be necessary for softer woods.
How Long Should You Wait Before Staining?
After sealing the wood, you might wonder how long to wait before staining. Typically, you should allow:
- 8-24 hours: This timeframe varies based on the type of sealer used and environmental conditions.
Conduct a simple test to see if it is ready for staining:
- Water Drop Test: Place a drop of water on the sealed surface. If it beads up, the surface is ready. If it absorbs, allow more drying time.
What Type of Stain Should You Use?
Choosing the right stain is as crucial as knowing how to seal wood before staining. Here are some options:
-
Oil-Based Stains: Provide deep penetration and rich color. Great for heavier woods.
-
Water-Based Stains: Great for easy cleanup, quick drying, and low VOC emissions. Ideal for indoor projects.
-
Gel Stains: Perfect for vertical surfaces and woods that sometimes absorb stains unevenly.
What Are Common Mistakes to Avoid?
While sealing and staining wood can seem straightforward, there are mistakes you should avoid:
-
Skipping the Sealer: Always seal for best results.
-
Applying Stain Too Soon: Wait until the sealer is fully dry.
-
Not Testing the Stain: Always test a small area to see how the wood reacts.
-
Using the Wrong Tools: Ensure you are using brushes or applicators suited for your sealant and stain.
What Are the Benefits of Properly Sealed and Stained Wood?
The last step is to appreciate the benefits of knowing how to seal wood before staining:
-
Longevity: Proper sealing extends the life of your wood finishes.
-
Enhanced Beauty: A well-stained surface highlights the grain, showcasing the wood’s natural beauty.
-
Resilience: Sealed wood is more resistant to scratches, stains, and moisture.
Conclusion
Learning how to seal wood before staining is an invaluable skill for any DIY enthusiast or professional woodworker alike. By properly sealing, preparing, and applying stain, you can achieve stunning results that not only enhance the appearance of your wood but also extend its longevity.
Follow these steps to give your wood projects the care they deserve. Happy woodworking!