Are you intrigued by the traditional craftsmanship of woodworking?
Learning how to make dovetail joints by hand is an essential skill that every passionate woodworker should master.
In this comprehensive guide, we’ll explore the step-by-step process to create beautiful dovetail joints that can elevate your woodworking projects.
What Are Dovetail Joints?
Dovetail joints are one of the most recognized and widely used forms of joinery in woodworking.
They consist of interlocking wedges shaped like a dove’s tail.
Key features of dovetail joints include:
- Strength: The unique shape of the joint provides incredible resistance against pulling apart.
- Aesthetics: They offer a visually appealing finish that showcases craftsmanship and attention to detail.
- Variability: Dovetail joints can be used in various applications, including drawers, cabinets, and furniture.
Why Should You Learn How to Make Dovetail Joints by Hand?
Understanding how to make dovetail joints by hand offers numerous benefits, including:
- Skill Development: Mastering this technique enhances your overall woodworking skills.
- Personal Satisfaction: There’s great joy in creating craftsmanship through traditional methods.
- Structural Integrity: Hand-cut dovetail joints are often stronger than their machine-cut counterparts.
- Customization: Hand-cut joints allow you to adapt the design and fit to your specific project.
What Tools Do You Need for Dovetail Joints?
Before we dive into the intricate process of making dovetail joints by hand, it’s crucial to gather the right tools.
Essential tools include:
- Dovetail Saw: A fine-toothed saw designed for precision cutting.
- Chisels: A set of various sizes will be helpful for clearing waste.
- Marking Gauge: Used to score lines accurately on your workpiece.
- Square: Ensures your cuts are straight and true.
- Pencil or Marking Knife: For marking out joint lines.
- Clamps: Essential for holding pieces securely together during assembly.
How Do You Mark Out Dovetail Joints?
The first step in how to make dovetail joints by hand is accurately marking out the joints.
Here’s a simplified process to follow:
-
Choose Your Material: Start with a high-quality wood that allows for clean cuts. Hardwoods like maple or walnut are commonly used.
-
Measure and Mark:
– Use your marking gauge to mark the thickness of both boards on the end grain and side grain.
– Determine the size and number of dovetails you want to cut; typically, 4-6 dovetails are sufficient for strong joints. -
Draw the Tail Profile:
– On the board that forms the ‘tails’, sketch the profile of the tails using a pencil or marking knife.
– Ensure your angles are approximately 1:7 or 1:8 (the slope) for a traditional look. -
Transfer Tail Marks:
– Place the marked tail board onto the pin board and trace the outline of the tails onto the pin board.
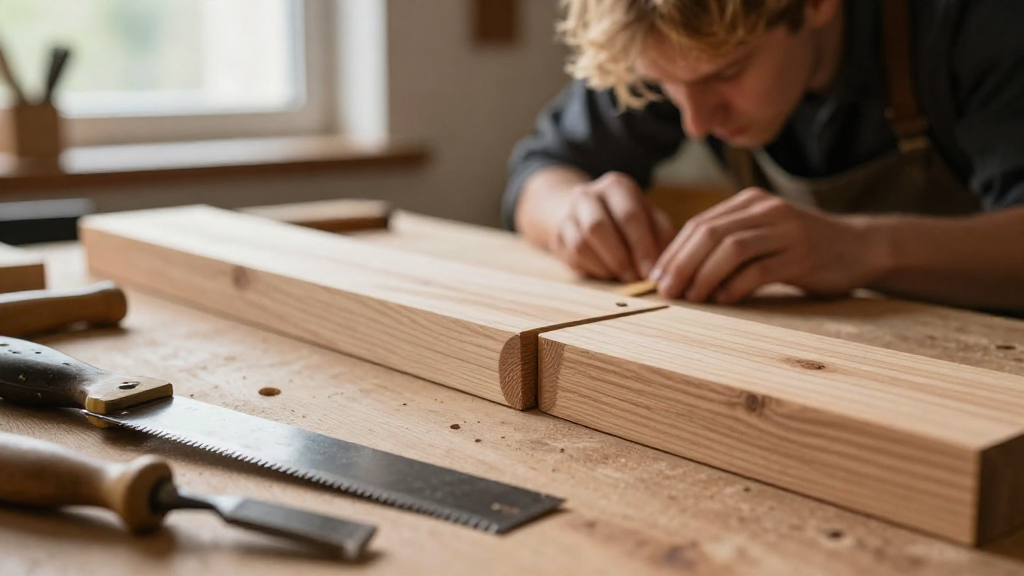
How to Cut Dovetail Joints by Hand?
Now that you’ve marked your boards, it’s time to cut the dovetails.
Here’s a straightforward approach:
Step-by-Step Process for Cutting Dovetail Joints
-
Cut the Tails:
– Clamp the Tail Board: Secure the tail board to your workbench using clamps.
– Saw Along the Lines: Using a dovetail saw, carefully cut along your marked lines.- Focus on maintaining a steady hand and consistent angle.
- Chisel the Waste: After cutting, use chisels to remove the waste between the tails cleanly.
- Flat Finish: Ensure the inner surface of each tail is flat for better fitting.
-
Cut the Pins:
– Secure the Pin Board: Clamp the pin board securely.
– Mark the Pins: Align with the tail board and mark the pins’ profile.
– Cut the Pins: Similar to the tail cuts, use the dovetail saw to achieve precise cuts.
– Remove the Waste: Use a chisel to carefully hollow out the waste from the pins. -
Dry Fit:
– After your cuts, perform a dry fit to check alignment.
– Ensure the joint fits snugly; adjust as necessary.
How Do You Assemble Dovetail Joints?
Once your dovetail joints are cut, it’s time for assembly. Here’s how to do it properly:
- Clean the Surfaces: Ensure that any glue or debris is removed from the joint surfaces.
- Apply Glue: Generously apply wood glue to the mating surfaces of the dovetails.
- Assemble: Carefully join the pieces, starting from the tail end and pressing together.
- Clamp: Use clamps to hold the joint tightly together while the glue sets.
– Wipe away any excess glue that comes out. - Let Dry: Allow the joint to dry fully per the glue manufacturer’s instructions before handling.
What Are Some Tips for Success?
Here are a few essential tips for mastering how to make dovetail joints by hand:
- Practice: Don’t be discouraged if your first attempts aren’t perfect. Start with scrap wood to hone your skills.
- Take Your Time: Rushing increases the chance of mistakes. Take your time during every step of the process.
- Maintain Tool Sharpness: Dull tools can lead to errors and frustration. Ensure your saws and chisels are well-maintained and sharp.
- Use a Template: Consider using a dovetail template for consistent results, especially when starting.
How Can Dovetail Joints Enhance Your Projects?
Incorporating dovetail joints into your woodworking projects not only increases strength but adds a distinctive beauty.
Projects like:
- Furniture: Dovetail joints are commonly found in high-end furniture design.
- Cabinetry: They provide lasting durability in drawers and cabinet assembly.
- Boxes: Boxes crafted with dovetails have an elegant look, making them ideal for gifts.
Conclusion
Mastering how to make dovetail joints by hand can elevate your woodworking repertoire and provide a strong, beautiful joint that will last for years.
With practice and the right tools, you can achieve professional-looking results that make each project a testament to your craftsmanship.
By following this guide, you’re now equipped with all the knowledge needed to create stunning dovetail joints that enhance the beauty and functionality of your woodworking projects.
So gather your tools, hone your skills, and start creating!