Have you ever wondered how to make finger joints that are not only strong but also visually appealing?
Finger joints, also known as box joints, are an excellent choice for creating sturdy and aesthetically pleasing connections in woodworking projects.
In this article, we will explore how to make finger joints using a table saw, ensuring your joints are clean and precise.
What Are Finger Joints and Why Use Them?
Finger joints consist of interlocking “fingers” that create a strong bond between two pieces of wood.
Using finger joints offers several benefits:
- Increased Surface Area: The interlocking nature increases the surface area for glue, leading to a stronger bond.
- Aesthetic Appeal: When done correctly, finger joints look polished and professional.
- Effective Use of Materials: They are especially useful in box construction or other applications where corner joints are needed.
Understanding how to make finger joints can elevate your woodworking projects significantly.
Which Tools Do You Need for Making Finger Joints?
You’ll require a few essential tools to get started on how to make finger joints:
- Table Saw: This is your primary tool for cutting the fingers.
- Dado Blade Set: A dado blade set allows for wider cuts, which is essential for finger joints.
- Measuring Tools: Precision measuring tools such as calipers and a square are crucial for accuracy.
- Wood: Choose the type of wood for your project; softer woods are easier to cut and shape.
- Clamps: For holding your pieces in place while cutting and gluing.
- Safety Equipment: Always use safety goggles and ear protection.
Having the right tools will ensure that you can proceed to make clean finger joints with confidence.
How Do I Set Up My Table Saw for Finger Joints?
Setting up your table saw is a crucial step in the process of how to make finger joints. Here’s how to do it:
- Install the Dado Blade: Begin by installing the dado blade set on your table saw.
- Set the Blade Height: Adjust the height to match the thickness of your wood. Typically, the blade height should be set around half the thickness of your material.
- Adjust the Fence: Measure the width of your finger cuts; adjust the table saw fence accordingly to ensure precision.
- Create a Test Piece: Before cutting your actual pieces, create a test piece to confirm the blade height and fence setting.
By methodically adjusting these settings, you set the stage for success.
How Do I Measure and Mark for Finger Joints?
Accurate measurement is vital when determining how to make finger joints. Follow these steps:
- Determine Finger Width: Decide on the number of fingers; 3-6 fingers are common for typical joints. Divide the total width of your joint by the number of fingers to find the width of each finger.
- Mark Your Wood: Use a square to mark your wood along both edges.
- Set the Depth: Use your measuring tools to mark the depth of your finger joints.
These steps ensure that your cuts will be uniform, creating clean finger joints.
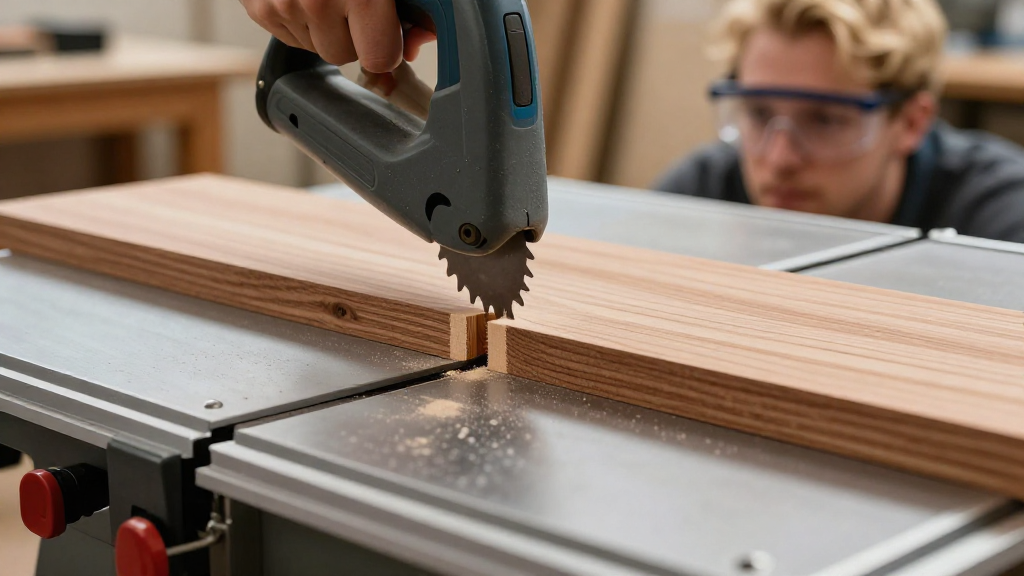
How Do I Cut the Finger Joints on a Table Saw?
Now, let’s get into the cutting phase of how to make finger joints:
- Align the Wood: Place your marked piece against the table saw fence.
- Make the First Cut: Power on the saw and make the first cut across the marked line.
- Measure and Adjust: After the first cut, remove the wood and measure the cut. Use your test piece to refine the fit.
- Repeat the Process: Continue making cuts according to your marked lines, adjusting the material against the fence for each finger joint.
- Regularly Check Fit: As you cut more fingers, periodically check the fit of your joints, ensuring they interlock seamlessly.
Following these steps will help you produce clean, precise finger joints every time.
How Do I Get Perfectly Fitted Joints?
After you make your cuts, it’s important to ensure that your finger joints fit together perfectly. Here’s how:
- Dry Fit Before Gluing: Always assemble your joints without glue first to check the fit.
- Sand the Edges: Use sandpaper on the edges of the cut fingers to smooth out any rough spots.
- Use Clamps: When you’re ready to glue your joints, apply wood glue and use clamps to secure the pieces together firmly.
- Wipe Away Excess Glue: Ensure no glue seeps out to avoid messy finishes.
Perfectly fitted joints require some care, but your efforts will lead to professional-grade results.
What Mistakes Should I Avoid When Making Finger Joints?
To excel at how to make finger joints, here are some common mistakes to avoid:
- Inaccurate Measurements: Double-check your measurements and cut marks. Even slight errors can cause fitting problems.
- Forgetting Safety Equipment: Always use your goggles and ear protection when operating the table saw.
- Improper Blade Height: Ensure your dado blades are not set too high or too low.
- Skipping Test Cuts: Always perform test cuts on scrap wood prior to cutting your final pieces.
Avoiding these pitfalls will help you achieve the desired quality in your woodworking projects.
How Do I Finish My Finger Joint Projects?
Once your finger joints are made and assembled, it’s time for the finishing touches:
- Final Sanding: Sand the entire piece to smooth out any surfaces and edges.
- Apply Finish: Choose your desired finish, whether it be paint, stain, or lacquer.
- Allow to Cure: Let the finish cure fully based on product specifications to prevent damage.
- Inspect for Flaws: After curing, ensure that all joints are secure and finish is even.
These finishing steps will enhance both the durability and the appearance of your finger joint project.
Conclusion: Why Learn How to Make Finger Joints?
Learning how to make finger joints with a table saw is not just about the technique; it’s about enhancing your woodworking skills and producing compelling projects.
From creating boxes to making frames, clean finger joints can significantly increase the strength and aesthetic value of your work.
With practice, you will master the art of finger joints, opening up endless possibilities in your woodworking journey.
Now that you are equipped with this knowledge, don’t just read—get out there and start crafting!