Do you want to learn how to build a coat rack that looks stunning and is functional?
Creating a coat rack in your home can be both a practical solution and a fun DIY project.
In this article, we’ll guide you step-by-step on how to build a coat rack that enhances your space and keeps your outerwear organized.
What Materials Do You Need to Build Your Coat Rack?
Before you dive into the project, it’s essential to gather all necessary materials and tools.
Here’s a list to get you started:
Materials:
- Wood planks (choose your preferred type, such as pine or oak)
- Wooden dowels or hooks
- Wood screws
- Wood glue
- Sandpaper (various grits)
- Wood stain or paint (optional)
- Clear wood finish (optional)
Tools:
- Saw (hand saw or miter saw)
- Drill with drill bits
- Screwdriver
- Measuring tape
- Level
- Paintbrush (if staining or painting)
Ensure you have protective eyewear and gloves for safety while working.
How Do You Measure and Cut the Wood?
Measuring accurately is crucial when learning how to build a coat rack.
Start by determining the dimensions based on your space.
Steps to Measure:
- Decide on the Height: Typically, a coat rack should be about 65-70 inches tall, allowing easy access for hanging coats.
- Determine the Width: A width of 36-48 inches is ideal for a family.
- Cut Your Wood: Using your measuring tape, mark the lengths and cut the pieces. You’ll generally need:
– A vertical piece for the back (main support)
– Horizontal pieces for the top and bottom bars
– Additional vertical pieces for stability
Make sure to use the saw carefully and wear your protective gear.
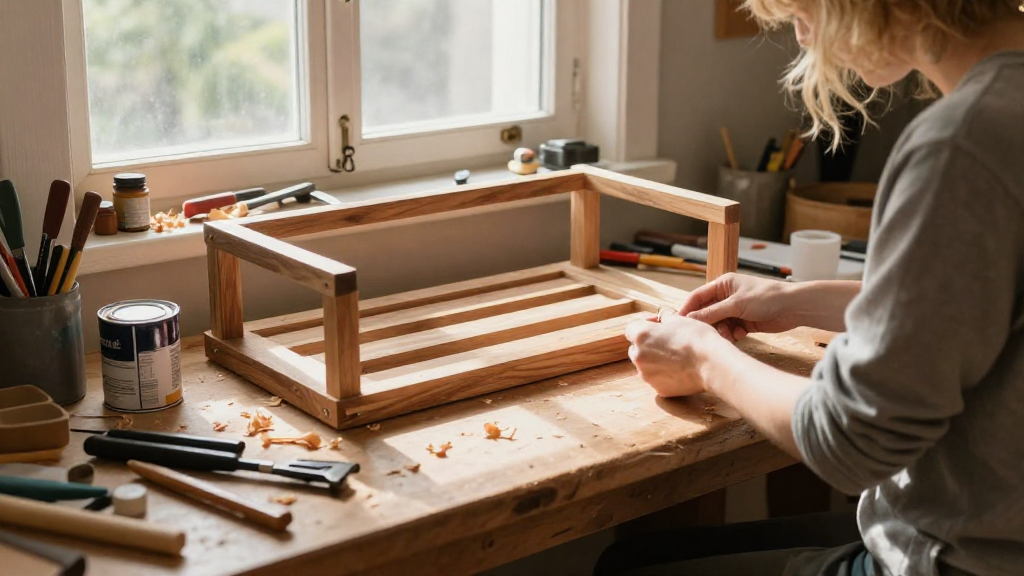
How Do You Assemble the Coat Rack?
Now that you have all your pieces cut, it’s time to assemble your coat rack.
Steps to Assemble:
- Lay Out the Pieces: On a flat surface, position the vertical and horizontal pieces as desired to visualize the coat rack’s dimensions.
- Attach the Horizontal Bars: Use wood screws to attach the top horizontal bar to the vertical support. Make sure it’s level for aesthetic appeal.
- Add Stability: If you’re using a bottom horizontal piece, attach it as well. This provides added stability.
Using wood glue in conjunction with screws can enhance the strength of your coat rack.
How Do You Add Hooks or Dowels?
Once your frame is assembled, it’s time to personalize your coat rack.
Deciding how many hooks you want and where to place them can affect its functionality.
Steps to Add Hooks or Dowels:
- Choose Your Arrangement: Measure and mark where you want to place the hooks. Try a staggered arrangement for a modern look.
- Drill Holes for Dowels or Hooks: Use your drill to make holes for the wooden dowels or to screw in hooks.
- Secure the Hooks/Dowels: If using hooks, screw them in tightly. If you’re using dowels, apply wood glue to hold them in place.
For added design, consider using decorative hooks that complement your home’s aesthetic.
How Can You Finish and Protect Your Coat Rack?
To ensure your coat rack lasts, applying a finish is essential.
Staining or painting your rack not only enhances its appearance but also protects the wood.
Steps to Finish:
- Sand Your Coat Rack: Use sandpaper to smooth any rough edges until the surface feels soft to the touch.
- Apply Stain or Paint: If you choose to stain, apply using a paintbrush in even strokes, following the wood grain. For paint, ensure that you use a color that matches your interior.
- Seal the Surface: Once the stain or paint dries, finish with a clear wood finish for extra durability.
Always allow ample drying time between coats.
Where Should You Place Your DIY Coat Rack?
Choosing the right location for your coat rack can make all the difference.
Ideal Placement Ideas:
- Near the Front Door: This is convenient for hanging coats upon entering your home.
- In the Entryway: If you have a mudroom, place it here for easy access.
- In the Bedroom: A decorative coat rack can also serve as an appealing element in your bedroom.
Consider the flow of your space and ensure it’s easily accessible without overcrowding your entry points.
How Do You Maintain Your Coat Rack?
After you learn how to build a coat rack, it’s essential to maintain it to prolong its lifespan.
Maintenance Tips:
- Regular Cleaning: Dust your coat rack regularly and wipe it with a damp cloth.
- Check Stability: Inspect for loose screws or hooks periodically and tighten as needed.
- Refinish as Needed: Over time, you may need to reapply wood finish or paint to keep it looking fresh.
Conclusion: Your Beautiful DIY Coat Rack Awaits!
Now that you know how to build a coat rack, you can create a piece that not only serves its purpose but also reflects your style.
With just a few materials and an afternoon of work, your DIY coat rack can be both functional and a statement piece.
Whether you opt for a rustic or modern design, this project is achievable for anyone, regardless of experience.
So gather your materials, follow these steps, and create a coat rack that truly enhances your home!
By embracing the DIY spirit, you can master how to build a coat rack that is not only practical but uniquely you, ensuring that every piece of outerwear has a stylish home.