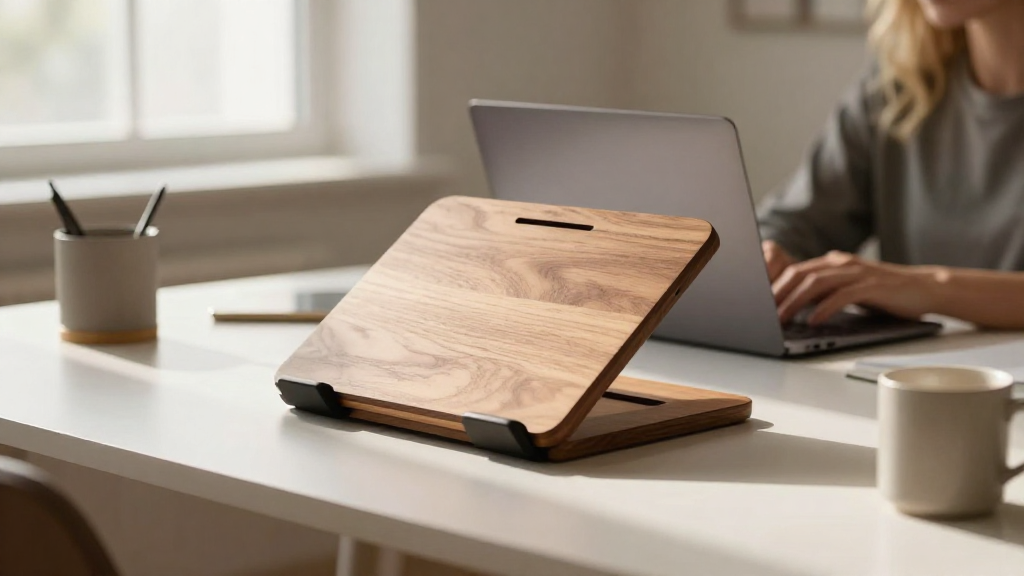
If you’ve ever wondered how to build a laptop stand from wood, you’re in the right place!
Creating a custom wooden laptop stand can be a rewarding DIY project that enhances your workspace’s ergonomics while adding a touch of personality. In this guide, we’ll break down the steps, materials needed, and tips for crafting your own wooden laptop stand.
What Materials Do I Need?
Building a wooden laptop stand requires several materials and tools. Here’s a concise list:
Materials
- Wood: Plywood, hardwood, or reclaimed wood
- Wood screws or brackets: To secure joints
- Wood glue: For added strength
- Sandpaper: Various grits for smoothing edges
- Wood finish: Optional for aesthetics and protection
Tools
- Saw: Table saw, circular saw, or hand saw
- Drill: With drill bits for pilot holes
- Measuring tape: For accurate dimensions
- Square: To ensure right angles
- Clamps: For holding pieces in place during assembly
How Do I Measure and Cut the Wood?
The first step in how to build a laptop stand from wood is to gather measurements.
-
Determine the Height:
– Measure the height at which you want your laptop screen to be. A common ergonomic height is eye level when seated. -
Decide on Width and Depth:
– Ensure your laptop fits comfortably. A standard size for stability is around 12-15 inches in depth and 22-24 inches in width. -
Make Your Cuts:
– Using your saw, carefully cut the wood pieces based on your measurements. You will generally need:- A top piece
- Two side pieces
- A back piece (optional for added stability)
Pro Tip: Always measure twice and cut once to avoid mistakes!
How Should I Assemble the Stand?
Now that you have your wooden pieces, it’s time to assemble the stand. Follow these steps:
-
Assemble the Base:
– Lay the two side pieces on a flat surface.
– Position the top piece horizontally, connecting the two sides. -
Secure with Screws or Wood Glue:
– Drill pilot holes to prevent wood from splitting.
– Use screws or wood glue to attach the top piece to the sides securely. -
Add the Back Piece (optional):
– For additional support, add the back piece, securing it with screws or brackets. -
Check for Stability:
– Ensure everything is level and stable before moving on.
How Do I Finish the Wooden Laptop Stand?
Once you’ve assembled your stand, you may want to give it a polished finish. Here’s how:
-
Sand:
– Use different grits of sandpaper to smooth all surfaces and edges. This step is crucial to avoid splinters. -
Stain or Paint:
– If you prefer a specific color, apply wood stain or paint.
– Ensure even coverage and allow sufficient drying time as specified on the product. -
Sealing:
– Apply a wood finish or sealant for protection. This step helps prevent damage from spills or moisture.
Tip: Always allow for adequate drying time for each finish layer before handling.
Why is Building Your Own Stand Beneficial?
There are several advantages to learning how to build a laptop stand from wood:
- Customization: Tailor the dimensions and style to fit your personal preferences.
- Ergonomics: Enhance your posture and reduce neck strain while working.
- Cost-Effective: A DIY stand can often be more affordable than purchasing a commercial product.
- Satisfaction: Enjoy the accomplishment of creating something useful and unique.
How Can I Ensure Quality Craftsmanship?
To guarantee the best outcome for your wooden laptop stand:
- Pay Attention to Detail:
- Measure and cut precisely.
-
Ensure secure joints for robust construction.
-
Use Quality Materials:
- Select durable wood suitable for the weight of your laptop.
-
Consider using sustainably sourced wood for an eco-friendly touch.
-
Practice Your Skills:
- If you’re new to woodworking, consider practicing on scrap wood before working on your final piece.
What Alternatives Exist for a Wooden Laptop Stand?
While how to build a laptop stand from wood is a popular choice, there are other creative options:
- Adjustable Stands: Some designs allow for height adjustments.
- Foldable Stands: These are great for portability and easy storage.
- Commercial Options: Plenty of ergonomic wooden stands are available to purchase if DIY isn’t feasible.
Final Thoughts on Making a Wooden Laptop Stand
Creating your own wooden laptop stand can be a rewarding project that enhances your workspace while being ergonomic and stylish.
Follow this guide on how to build a laptop stand from wood to craft an essential piece of furniture that reflects your style and meets your needs.
As you embark on this DIY journey, remember to enjoy the creative process, celebrate your craftsmanship, and admire the function and aesthetic your stand adds to your workspace!
By incorporating these tips and materials, you’ll successfully create a durable, functional item that enhances your daily tasks. Happy woodworking!
With this comprehensive approach, you’ll have the knowledge and confidence to produce a fantastic wooden laptop stand. Whether you’re a beginner or a seasoned DIY enthusiast, your skills will shine through in your craftsmanship, and soon enough, you’ll have a beautiful stand to show for your efforts.