If you’re eager to learn how to build a shoe rack from wood, you’re in the right place!
Creating a custom shoe rack is an excellent project for beginners looking to enhance their woodworking skills.
It’s not only beneficial for keeping your space organized, but it also adds a personal touch to your home decor.
Let’s dive into how you can easily complete this project with minimal tools and materials.
What Do You Need to Build a Wooden Shoe Rack?
Before we jump into how to build a shoe rack from wood, it’s essential to gather all the materials and tools you’ll need for the project.
Materials Needed
- Wood boards (1×12 inch boards are ideal)
-
You’ll need two pieces for the top and bottom, plus several for the sides and shelves.
-
Wood screws (1.25-inch screws)
- Wood glue (for added strength)
- Sandpaper (80 and 220 grit)
- Wood finish (optional, but recommended for durability)
Tools Required
- Drill/driver
- Measuring tape
- Saw (hand saw or miter saw)
- Square
- Clamps (optional, but helpful)
How Do You Measure for a Wooden Shoe Rack?
Accurate measurements are critical when you want to learn how to build a shoe rack from wood.
Step-by-Step Measurement Guide
-
Determine the Size:
– Consider the space available in your home.
– A standard shoe rack is approximately 30 inches wide and 36 inches high.
– Make adjustments based on your needs. -
Design the Shelves:
– A good size for each shelf is about 10 to 12 inches deep.
– You can have 3-5 shelves, depending on how many pairs of shoes you need to store. -
Make a Template:
– Sketch your design, marking where the shelves will go.
– This will help when you start cutting your wood.
How Do You Cut the Wood for the Shoe Rack?
Once you have your measurements sorted, it’s time to cut the wood pieces according to your design.
Cutting Instructions
-
Mark Your Cuts:
– Use a pencil to mark where you’ll cut each piece.
– Use a square to ensure that your lines are straight. -
Cut the Pieces:
– Carefully cut along the marked lines with your saw.
– You should have:- 2 pieces for the top and bottom
- 2 pieces for the sides
- 3-5 pieces for shelves
-
Smooth the Edges:
– Use coarse 80-grit sandpaper to smooth any rough edges.
– Follow up with 220-grit sandpaper for a finer finish.
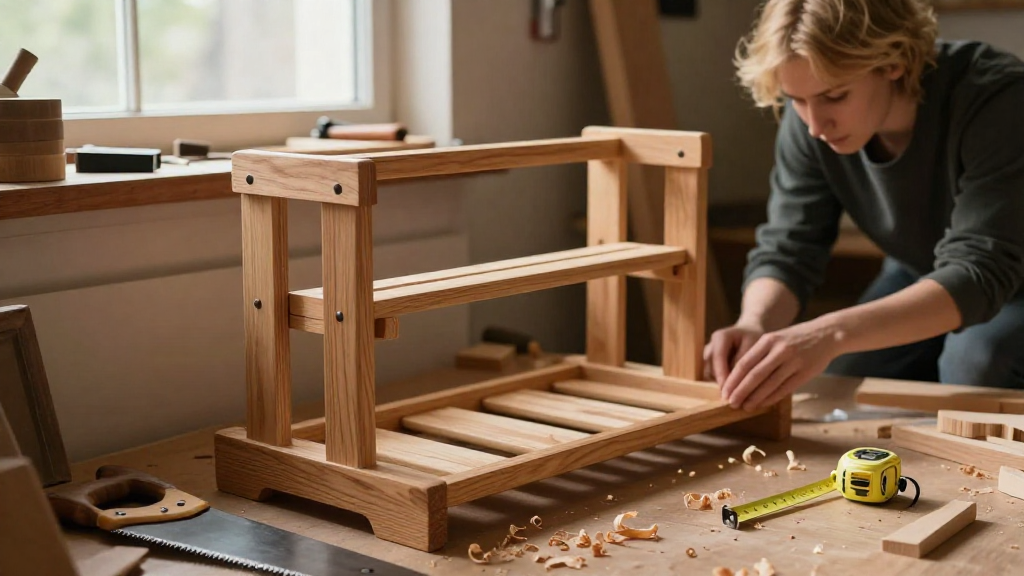
How Do You Assemble the Shoe Rack?
Now that your wood is cut and ready, it’s time to assemble your shoe rack.
Assembly Steps
-
Attach the Sides:
– Start by attaching the side pieces to the bottom piece using wood screws and wood glue.
– Ensure everything is square for stability. -
Install the Shelves:
– Mark where each shelf will sit on the side pieces.
– Use screws or brackets to secure the shelves in place.
– Space them evenly to accommodate different shoe sizes. -
Add the Top Piece:
– Secure the top piece in the same manner as the bottom.
– Check for level and stability. -
Clamp and Dry:
– If you are using glue, clamp the pieces together for a better bond.
– Allow the glue to dry for about 24 hours.
How Do You Finish the Wooden Shoe Rack?
Finishing touches can elevate your shoe rack and keep it looking great for years to come.
Finishing Guide
-
Sanding:
– Sand the entire surface with 220-grit sandpaper to ensure it’s smooth. -
Staining or Painting:
– Choose a wood stain that matches your decor.
– Alternatively, you can paint your rack to add a pop of color.
– Apply at least two coats, allowing proper drying time between applications. -
Seal the Finish (Optional):
– For added protection, consider using a clear wood finish to seal your project.
– This is especially important if the rack will be in a damp environment.
How Do You Style Your New Wooden Shoe Rack?
Once your shoe rack is built and finished, it’s time to place it in your home.
Here are some styling tips to consider:
Styling Tips
- Position: Place your shoe rack near an entryway or closet for easy access.
- Decorate: Add potted plants, decorative boxes, or even framed pictures on top for an aesthetic touch.
- Organize: Arrange your shoes by style or color for a neat look.
Conclusion: Can You Build a Wooden Shoe Rack?
In just a few steps, you’ve learned how to build a shoe rack from wood!
This project is perfect for beginners and anyone looking to enhance their space with a practical yet stylish addition.
Not only have you upgraded your organizing abilities, but you’ve also developed valuable woodworking skills.
So roll up your sleeves, gather your materials, and start crafting your own wooden shoe rack today!
Whether you’re an experienced DIYer or just starting out, this easy wooden shoe rack project is perfect for everyone looking to get their shoes in order!