When it comes to woodworking, knowing how to create a glue station in workshop is essential for ensuring efficient and effective projects.
In this article, we will explore the benefits, materials, design considerations, and step-by-step instructions to establish your very own glue-up station.
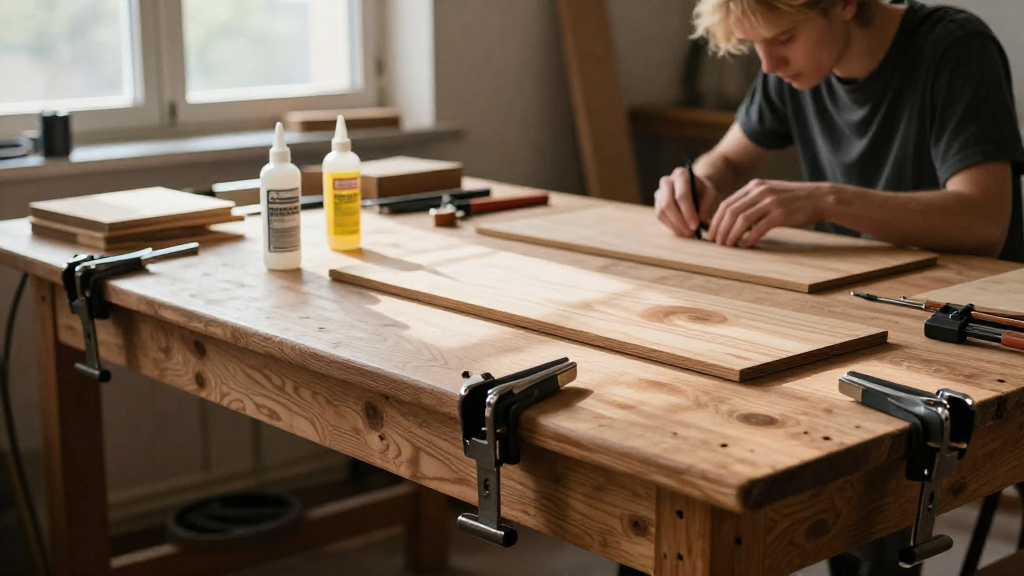
What is a Glue-Up Station?
A glue-up station is a dedicated workspace designed specifically for assembling and gluing pieces of wood together.
This space allows for:
- Clutter-free environment: Helps to keep your main workspace organized.
- Enhanced efficiency: Streamlines the gluing process for larger projects.
- Improved results: Reduces the risk of messes and mistakes.
Why Do You Need a Glue-Up Station?
Learning how to create a glue station in workshop can significantly enhance your woodworking experience. Here’s why having a dedicated space is important:
-
Consistency: Ensures that you can repeat your methods and achieve uniform results each time.
-
Focus: Reduces distractions from other tasks, allowing you to concentrate on alignment and application.
-
Safety: Lessens the risk of spills and accidents, keeping your workspace cleaner and safer.
What Materials Do You Need?
Creating an effective glue-up station requires some specific materials. Here’s a list to help you get started:
-
Workbench or table: A flat, sturdy surface to work on.
-
Clamps: Various sizes suitable for different projects.
-
Glue trays: For holding and distributing glue.
-
Brushes or rollers: Essential for applying glue evenly.
-
Roll of wax paper: To protect the surface from glue spills.
-
Measurement tools: Rulers and squares for accurate alignment.
-
Waste container: For disposal of old glue and other debris.
-
Storage racks: For organizing clamps and tools.
How to Create a Glue Station in Your Workshop: Step-by-Step
Now, let’s discuss the process of building this dedicated glue-up station to ensure you know exactly how to create a glue station in workshop.
Step 1: Selecting the Location
Choose a convenient spot in your workshop that is both well-lit and away from other distractions. Consider proximity to your primary workbench and storage areas.
Step 2: Building or Adapting Your Work Surface
If you already have a workbench, you can convert it into a glue-up station:
-
Clear the workspace: Make sure there are no tools or debris on your work surface.
-
Add a waterproof cover: This could be laminate or hardboard to protect against glue spills.
If you need to construct a new work surface:
-
Dimensions: Aim for a size that can comfortably accommodate your projects. A top that’s at least 48 inches long will allow for longboards.
-
Sturdiness: Ensure it can withstand the pressure from clamping various assemblies.
Step 3: Organizing Your Clamps
An organized setup will make your glue station much more efficient. Consider:
-
Wall-mounted racks: These can hold different types of clamps for easy access.
-
Clamp caddies: A rolling caddy can help you keep similar-sized clamps closer together.
Step 4: Setting Up Glue Storage
How you store glue can make a big difference. Keep in mind:
-
Vertical storage: Store bottles upside down in a dedicated caddy or shelf to ensure the glue is always ready for use.
-
Temperature control: Keep glue in a controlled environment to maintain its viscosity and usability.
Step 5: Incorporating Cleanup Tools
Always have the necessary cleanup tools readily available:
-
Scrapers: To remove dried glue from surfaces.
-
Paper towels: For easy cleanups.
-
Water container: For brush cleaning or wiping down surfaces.
Step 6: Final Touches
Make the space your own:
-
Label storage containers: This will remind you where everything belongs and keep you organized.
-
Create a checklist: Of tasks and supplies to ensure a seamless workflow.
How Can You Maintain Your Glue-Up Station?
Establishing how to create a glue station in workshop is only half the battle. Maintaining it is just as crucial. Here are some tips:
-
Regularly check for glue residue: Cured glue can ruin a clean project surface if not removed.
-
Test your glues: Ensure every bottle is still usable by doing a quick test before starting a new project.
-
Organize tools: Spend a few minutes each week to reorganize your workspace and put tools back in their designated spots.
Conclusion
Creating a dedicated glue-up station in your workshop is an invaluable asset for any woodworking enthusiast.
By following these steps on how to create a glue station in workshop, you’ll not only enhance your workflow but also elevate the quality of your work.
Investing time in designing and maintaining this space will pay off significantly in the long run, allowing for cleaner, safer, and more efficient projects.
Your Next Steps
Start planning your glue-up station today!
Consider what materials you may need, how you want your space to be organized, and which projects you’ll tackle first.
Happy woodworking!