If you’re passionate about your woodworking projects, knowing how to insulate a woodworking shed is crucial for maintaining a comfortable and efficient working environment throughout the year.
Why Should You Insulate Your Woodworking Shed?
Insulating your woodworking shed helps to:
- Regulate temperature: Keeping your workspace warm in winter and cool in summer ensures you can work comfortably year-round.
- Prevent moisture build-up: Insulation can reduce condensation, minimizing the risk of mold and protecting your wood and tools.
- Enhance energy efficiency: Proper insulation can lower heating and cooling costs, making your woodworking space more cost-effective.
What Materials Do You Need to Insulate a Woodworking Shed?
Before you dive into how to insulate a woodworking shed, you’ll need to gather the right materials. Here is a list of the key supplies:
- Insulation material: Options include fiberglass batts, foam boards, spray foam, or cellulose.
- Vapor barrier: This helps prevent moisture from the inside air getting into the insulation material.
- Drywall or plywood: For finishing the interior walls.
- Noise-reducing material (if needed): Soundproofing may be essential if your woodworking generates significant noise.
- Sealants and weatherstripping: These will help seal gaps and prevent drafts.
- Fasteners and tools: Screws, nails, and a variety of tools to help you during the installation process.
How Do You Prepare Your Woodworking Shed for Insulation?
Preparing your woodworking shed is critical to ensure a successful insulation job. Follow these steps:
-
Clear out the space: Remove any tools, equipment, and materials from the shed. This will give you a clean slate to work with.
-
Inspect for damages: Check for any leaks, rot, or gaps in walls and roof. Repair any issues before you begin insulating.
-
Clean the surface: Ensure all walls, ceilings, and floors are clean and free from debris for optimal adhesion of insulation materials.
-
Plan your insulation layout: Measure the area to determine how much insulation you’ll need and create a plan for installation.
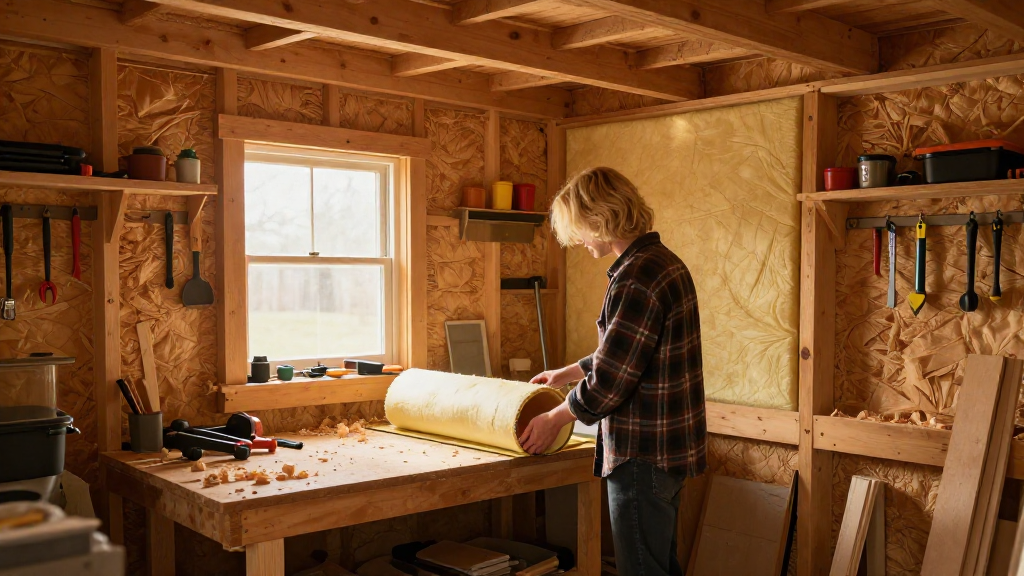
How Do You Insulate the Walls of Your Woodworking Shed?
The walls are a critical part of learning how to insulate a woodworking shed effectively. Here’s a step-by-step guide:
-
Select your insulation material: Choose between fiberglass, foam boards, or spray foam, based on your budget and preferences.
-
Cut insulation to size: If you’re using batts or foam boards, cut them appropriately to fit snugly between the wall studs.
-
Install the insulation:
– For batts, gently compress the insulation and fit it into place, ensuring it fills the entire cavity without gaps.
– For foam boards, attach them directly to the wall studs using adhesive or mechanical fasteners. -
Seal it all up: Use a vapor barrier to cover the insulation. This barrier should be on the warm side of the insulation to prevent moisture build-up.
-
Finish the walls: Cover the insulation with drywall or plywood to give a finished look.
What About the Ceiling and Floor of Your Woodworking Shed?
Don’t overlook the ceiling and floor when considering how to insulate a woodworking shed! Here’s how to insulate these areas:
Ceiling Insulation
- Choose insulation material: Similar to the walls, you can use fiberglass batts, foam boards, or spray foam for ceiling insulation.
- Follow the same steps: Cut the insulation to fit between ceiling joists and install it accordingly.
- Seal gaps: Make sure to seal any gaps with a vapor barrier and ensure the finish is covered with drywall or plywood.
Floor Insulation
- Consider your option: If your shed is built on a concrete slab, you might want to insulate the perimeter with rigid foam boards.
- Use proper materials: For wooden floors, you can install insulation between the joists.
- Install a vapor barrier: A barrier can also be useful under the floor if you are facing moisture issues.
How Can You Ensure Proper Ventilation After Insulation?
While how to insulate a woodworking shed is essential, proper ventilation is just as crucial. You don’t want your newly insulated space to trap moisture or air pollutants. Here’s how to manage ventilation:
- Install vents: Ensure adequate airflow by adding intake and exhaust vents.
- Opt for windows: If possible, include operable windows to promote natural airflow.
- Use fans: Consider adding exhaust fans to ensure air changes and remove excess humidity.
What are the Benefits of Insulating Your Woodworking Shed?
Understanding the perks of insulating can motivate you to tackle the project. Here are some significant benefits:
- Comfortable working conditions: Insulation maintains a stable environment, engaging your creativity without temperature-related distractions.
- Preservation of materials: Proper insulation keeps your wood and tools in excellent condition, free from moisture damage or temperature-related warping.
- Increased shed value: An insulated shed can serve as a more versatile space, enhancing its overall value should you ever decide to sell.
Conclusion: Mastering How to Insulate a Woodworking Shed
Now that you understand how to insulate a woodworking shed, you can create an all-season retreat for your woodworking passions.
With the right materials, a bit of preparation, and an understanding of proper insulation methods, you can transform your shed into a comfortable and functional workspace.
Remember to consider your heating and cooling needs, as well as the ventilation in your shed, to ensure optimal working conditions.
Get started today! Your woodworking projects deserve a dedicated, well-insulated space.