When it comes to woodworking, knowing how to make a half-lap joint is essential for creating strong and durable connections between pieces. In this guide, you will learn not only the technique but also the tools and materials needed, ensuring your woodworking projects stand the test of time.
What is a Half-Lap Joint?
A half-lap joint is one of the most commonly used joints in woodworking.
It involves removing half the thickness from each piece of wood where they intersect, allowing them to overlap and create a strong bond.
Benefits of a Half-Lap Joint:
- Strength: The overlapping surface provides a significant area for glue, enhancing joint strength.
- Ease of Construction: The joint can be easily cut with basic tools, requiring no specialty equipment.
- Versatility: Ideal for frames, furniture, and cabinetry.
Understanding how to make a half-lap joint will add tremendous value to your woodworking skills.
What Tools Will You Need?
Before starting, ensure you have the right tools at your disposal.
Here’s a list of the essential tools for making a half-lap joint:
- Measuring Tape: For precise measurements.
- Square: To ensure accurate angles.
- Pencil: For marking your cuts.
- Chisels: For carving out the joint.
- Handsaw or Circular Saw: To cut the wood.
- Clamps: To hold pieces together during assembly.
- Wood Glue: For a strong bond.
Having these tools ready will streamline the process and help you achieve a successful half-lap joint.
How Do You Measure for the Joint?
Accurate measurements are vital when learning how to make a half-lap joint.
Follow these steps:
-
Determine the Thickness:
Measure the thickness of the pieces you plan to join. -
Mark the Center Point:
Using your square and pencil, draw a line across both pieces of wood at the center of where the joint will be. -
Calculate the Cut Width:
Since you will be removing half the thickness, the cut should equal half the thickness of the wood for both pieces. -
Draw Cutting Lines:
Measure and mark cutting lines parallel to the grain on each piece, ensuring that they align correctly.
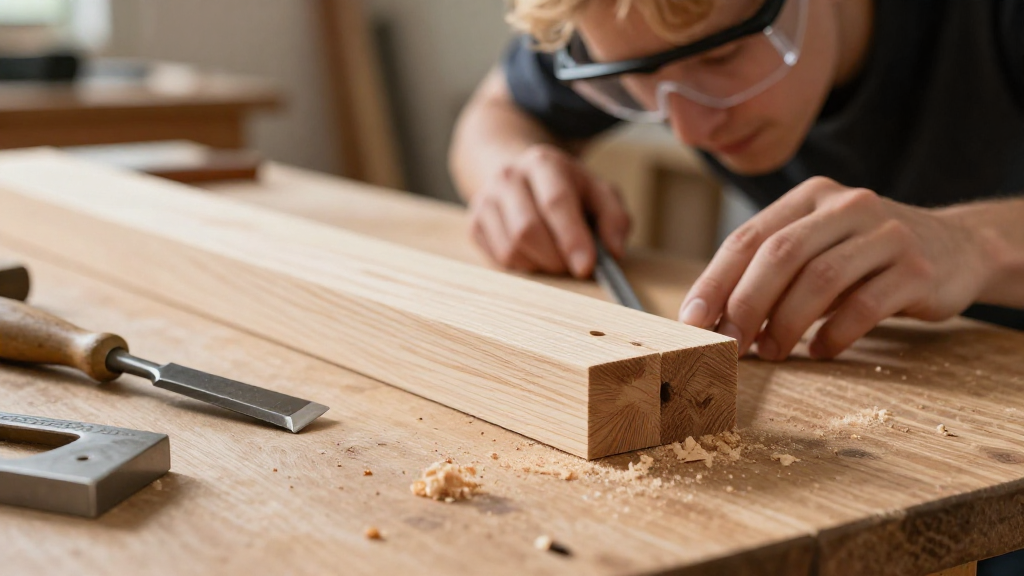
How to Cut the Joint?
Now that you have your measurements in place, you can begin cutting the joint.
Here’s how to proceed:
-
Align the Wood Securely:
Use clamps to hold the pieces steady on your workbench. This prevents movement as you cut. -
Make the Initial Cut:
Using a handsaw or circular saw, carefully cut along the marked line. For more intricate cuts, a chisel may offer better control. -
Remove Material:
After making the cut, use a chisel to carefully remove the waste material from the half-lap area.
- Angle the Chisel: Start at a slight angle to help guide the chisel further into the cut.
- Work Slowly: Take your time to avoid chipping the wood.
- Test the Fit:
After cutting, place the pieces together to ensure they fit snugly.
How to Assemble the Half-Lap Joint?
After successfully cutting the joint, it’s time to assemble the two pieces. Follow these simple steps:
-
Apply Wood Glue:
Generously apply wood glue on the surfaces of the joint. This enhances adhesion. -
Join the Pieces:
Carefully align the pieces and press them together, ensuring the half-lap sections overlap correctly. -
Clamp the Joint:
Use clamps to hold the pieces firmly while the glue sets.
- Leave for 30-60 Minutes: This allows the adhesive to cure properly. Check the manufacturer’s instructions for specific drying times.
- Clean Excess Glue:
Wipe off any excess glue using a damp cloth before it dries, ensuring a clean finish.
How to Finish the Half-Lap Joint?
Once the glue has set, you can finish your joint:
-
Trim and Sand:
Use sandpaper to smooth out any rough edges or surfaces created during the cutting process. -
Paint or Stain:
If desired, apply paint or stain to match your project. This enhances the appearance of your joint. -
Final Assembly:
With your half-lap joint complete and finished, you can proceed to connect it with other parts of your project—be it a frame, a shelf, or furniture.
Tips for Success
When learning how to make a half-lap joint, keep these tips in mind for better results:
- Practice on Scrap Wood: If you’re new to this joint, practice on scrap wood until you feel comfortable.
- Use Quality Wood Glue: Not all wood glues are equal; choose a strong adhesive for the best results.
- Check for Squareness: Regularly check that your joint remains square to avoid any issues during final assembly.
By following these steps and tips, you’ll be well on your way to creating strong and reliable half-lap joints in your woodworking projects.
Conclusion
Understanding how to make a half-lap joint is an invaluable woodworking skill.
This joint not only offers strength and durability but also flexibility in design.
Whether you’re a beginner or an experienced woodworker, mastering this technique will enhance your crafting abilities.
Now that you have a comprehensive guide at your disposal, gather your materials, and start creating beautiful, sturdy pieces with half-lap joints!