Are you wondering how to refinish wood furniture and give your beloved pieces a new lease on life?
Refinishing old wood furniture can not only enhance its beauty but can also help preserve its functionality.
In this guide, we will take you through the steps to successfully refinish your wood furniture, making the process easy, straightforward, and rewarding.
What Materials Do You Need for Refinishing Wood Furniture?
Before diving into the actual refinishing process, it’s essential to gather all the necessary materials. Here’s a checklist to help you get started:
- Sandpaper (various grits: 60, 120, and 220)
- Wood stain
- Sealer or topcoat (such as polyurethane)
- Paintbrushes (various sizes)
- Cloth rags
- Wood filler (if necessary)
- Putty knife
- Safety goggles and mask
- Drop cloth
- Mineral spirits (for cleaning)
Having all these materials on hand will ensure that your project goes smoothly without unnecessary interruptions.
How Do You Prepare the Furniture for Refinishing?
Preparation is key when learning how to refinish wood furniture.
Here’s a simple step-by-step guide:
-
Choose Your Location
– Find a well-ventilated area to work in.
– Lay down a drop cloth to protect the floor. -
Remove Hardware
– Take off any knobs, handles, or hinges to avoid them being damaged or covered in dust. -
Clean the Surface
– Wipe down the furniture with a damp cloth to remove dirt and grime.
– Allow it to dry completely. -
Inspect for Damage
– Check for scratches, dents, or loose joints.
– Use wood filler and a putty knife to repair any significant damage. -
Sand the Surface
– Begin with 60-grit sandpaper and sand the old finish off evenly.
– Follow up with 120-grit and finish with 220-grit sandpaper for a smooth surface.
Make sure to sand in the direction of the wood grain to avoid scratches.
What is the Best Way to Stain the Wood?
Once you have prepared your furniture, you can begin the staining process. Here’s how to refinish wood furniture effectively:
-
Select Your Stain
– Choose a wood stain that complements your style.
– Test it on a small, inconspicuous area first. -
Apply Stain
– Dip a clean cloth or brush into the stain and apply it to the wood.
– Work in small sections, following the direction of the grain. -
Wipe Off Excess
– Allow the stain to sit for a few minutes, depending on how dark you want the color.
– Wipe off any excess stain with a clean cloth, blending the edges. -
Let it Dry
– Allow the stain to dry thoroughly, typically a few hours or as recommended. -
Apply Additional Coats (Optional)
– If you desire a darker color, repeat the process until you achieve the desired shade.
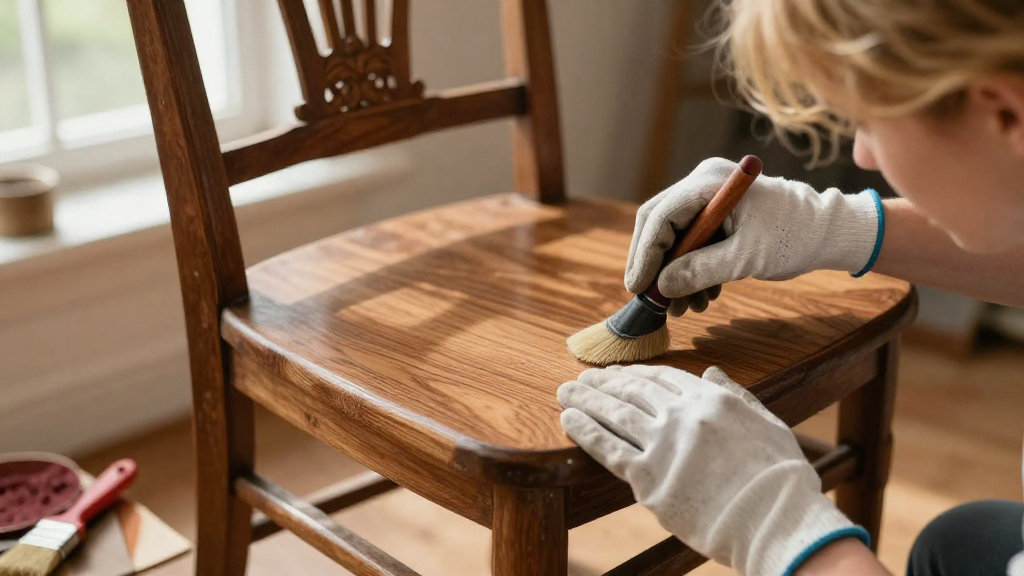
How Do You Seal and Protect the Finish?
After staining the furniture, the next step in learning how to refinish wood furniture is sealing it for protection.
Follow these steps:
-
Choose Your Topcoat
– Select either an oil-based or water-based polyurethane according to your preference.
– Oil-based finishes offer durability, while water-based options dry faster. -
Apply the First Coat
– Using a clean brush, apply a thin layer of the topcoat evenly, again working with the wood grain. -
Let It Dry Properly
– Allow the first coat to dry according to the manufacturer’s instructions. -
Sand Between Coats
– Once dry, lightly sand the surface with 220-grit sandpaper to create a smoother finish. -
Repeat Topcoat Application
– Apply 2-3 coats of finish, sanding lightly between each for optimal results.
What Are the Final Touches After Refinishing?
Now that you have refinished the wood, it’s time to put on the final touches.
-
Reattach Hardware
– Once everything is fully dry, reattach any knobs, handles, or hinges that you removed earlier. -
Final Clean
– Wipe the surface down with a clean, dry cloth to eliminate any dust or debris. -
Cure Time
– Keep in mind that though the finish may feel dry, it’s important to allow it to cure entirely per the manufacturer’s recommendations, which can take up to several days.
Why Should You Refinish Old Wood Furniture?
Refinishing old wood furniture is not only an environmentally friendly option compared to buying new pieces, but it also has several benefits:
- Cost-Effective: Saves money while keeping valuable pieces.
- Customization: Choose colors and finishes for a personalized touch.
- Skill Development: Gain practical skills while engaging in a fulfilling project.
- Sentimental Value: Preserve family heirlooms and personal memories.
When is It Time to Refurnish or Replace?
While many pieces of wood furniture can be refinished, assess the furniture’s condition to ensure it’s worth the effort.
Consider replacing instead if you notice:
- Extensive damage beyond repair (like broken legs).
- The piece lacks structural integrity.
- It doesn’t suit your personal style anymore, even after refinishing.
By following this guide on how to refinish wood furniture, you can breathe new life into your cherished pieces and create unique, beautiful additions to your home.
Conclusion
In conclusion, knowing how to refinish wood furniture opens doors to a rewarding DIY project that enhances your living space.
With the right materials, preparation, and patience, you can transform old pieces into stunning focal points in your home.
Remember, even as trends change, a well-refinished piece of wood furniture retains its charm and value. So grab your tools, and let the refinishing begin!