When it comes to woodworking, the mortise and tenon joint guide is an indispensable resource for both beginners and seasoned craftsmen alike.
What is a Mortise and Tenon Joint?
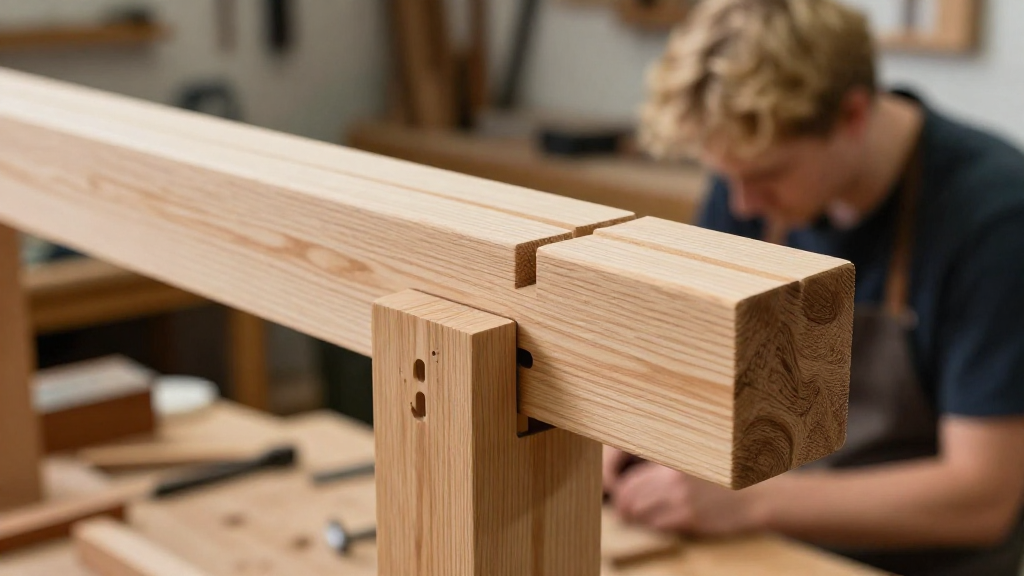
The mortise and tenon joint is one of the oldest and most reliable woodworking joints.
It consists of two components:
- Mortise: A recess cut into one piece of wood.
- Tenon: A corresponding projection on another piece, which fits into the mortise.
This joint is known for its strength and durability, making it a favorite in the construction of furniture, frames, and doors.
In fact, many historical and contemporary wooden structures rely on this joint for added stability.
Why Should You Use Mortise and Tenon Joints?
There are several compelling reasons to utilize a mortise and tenon joint in your woodworking projects:
- Strength: The interlocking nature of the joint provides exceptional tensile strength, making it ideal for load-bearing applications.
- Durability: When properly constructed and glued, a mortise and tenon joint can last for generations.
- Versatility: This joint can be used in a variety of woodworking situations, from cabinets to outdoor furniture.
- Traditional Appeal: The craftsmanship involved in creating a mortise and tenon joint offers aesthetic value, showcasing the skill of the woodworker.
How Do You Create a Mortise and Tenon Joint?
Creating a mortise and tenon joint requires precision and care.
Here’s a step-by-step guide to help you through the process:
Tools You’ll Need
To start your mortise and tenon joint guide, gather the essential tools:
- Chisels (flat and mortise chisels)
- Wooden Mallet
- Drill (for making mortises)
- Saw (tenon saw or miter saw)
- Square (for measuring right angles)
- Wood Glue (for reinforcing the joint)
- Clamps (to hold pieces together while the glue dries)
Step 1: Measuring and Marking
- Measure the Length and Width: Decide how deep and wide you want the mortise to be. Typically, the tenon’s dimensions will correlate with the mortise.
- Mark the Wood: Use a square to mark the outline of the mortise on the wood piece. Ensure the lines are straight and clear.
Step 2: Cutting the Mortise
- Drill Holes: Start by drilling one or multiple holes within the marked outline of the mortise.
- Chisel It Out: Use a chisel and mallet to remove the excess wood, creating a clean mortise that is the right size and depth.
Step 3: Fabricating the Tenon
- Cut the Tenon Shape: Use a saw to create the tenon on the end of the second piece of wood. It should fit snugly into the mortise.
- Test the Fit: Regularly check the fit of the tenon in the mortise to ensure a tight and secure connection.
Step 4: Assembly
- Apply Wood Glue: Before inserting the tenon into the mortise, apply a thin layer of wood glue on both surfaces.
- Insert the Tenon: Carefully fit the tenon into the mortise, ensuring the joint is aligned properly.
- Secure with Clamps: Use clamps to hold the joint in place while the glue dries. Follow the glue manufacturer’s instructions for the drying time.
Step 5: Finishing Touches
Once the glue has set, you can:
- Trim Excess: Cut off any excess tenon protruding from the mortise.
- Sand: Smooth the joint with sandpaper for a clean finish.
What Types of Mortise and Tenon Joints Are There?
The mortise and tenon joint guide wouldn’t be complete without a discussion on the various types of joints:
-
Through Mortise and Tenon: Visible from both sides of the wood, this joint is common in furniture such as tables and chairs.
-
Blind Mortise and Tenon: The tenon is hidden within the mortise, making this joint ideal for applications where aesthetics are crucial.
-
Half-Lap Joint: A variation where half of each piece of wood is removed to create a flat joint. It’s easier to construct but may not be as strong.
-
Corner Mortise and Tenon: Used specifically at the corners of frames, adding stability to a structure.
When Should You Use a Mortise and Tenon Joint?
This joint is suitable for various woodworking projects, including:
- Cabinets and Chests: Provides a strong connection for heavy doors.
- Tables and Chairs: Essential for creating sturdy leg connections.
- Doors and Frames: Ensures that doors swing smoothly and remain securely attached.
Tips for Mastering Mortise and Tenon Joints
To enhance your skills with the mortise and tenon joint, consider the following tips:
- Practice Makes Perfect: Start with smaller projects before moving on to larger pieces.
- Use Quality Wood: Select high-quality hardwoods for durability and longevity.
- Maintain Sharp Tools: Dull chisels and saws can lead to jagged cuts and uneven joints.
Common Mistakes to Avoid
When working on your mortise and tenon joint guide, keep an eye on these common pitfalls:
- Poor Measurements: Always double-check your measurements before cutting.
- Rushing the Drying Process: Allow glue to fully cure before stressing the joint.
- Neglecting the Fit: An overly tight or loose fit can weaken the joint’s strength.
Conclusion: Why Mortise and Tenon Joints Matter
Understanding the intricacies of mortise and tenon joints can significantly elevate your woodworking projects.
This traditional joinery technique provides unparalleled strength and durability, making it a staple in the craft.
Utilizing this mortise and tenon joint guide, you can create beautiful, lasting pieces that stand the test of time.
Whether you’re crafting a simple frame or a complex piece of furniture, mastering the mortise and tenon joint can be immensely beneficial.
So gather your tools, get inspired, and start building your next woodworking masterpiece!