If you’ve ever wondered how to make a small bookshelf, you’re in the right place! Creating your own bookshelf not only showcases your favorite books but also adds a personal touch to your home decor. In this guide, we’ll walk you through simple steps that even a beginner can follow to craft a small bookshelf that meets your needs and style preferences.
What Tools Do You Need?
Before we dive into the actual building process, it’s essential to gather the right tools. Here’s a list of what you’ll need:
- Tape Measure: To measure your space and materials.
- Pencil: For marking measurements.
- Saw: A circular saw or handsaw will work well.
- Drill: For making holes and driving screws.
- Screwdriver: To secure everything together.
- Sander: To smooth out edges.
- Level: To ensure your bookshelf is even.
- Safety Gear: Such as goggles and gloves for protection.
These tools will help you effectively create the small bookshelf of your dreams.
What Materials Should You Use?
When learning how to make a small bookshelf, choosing the right materials is crucial. Here are some options:
- Plywood: A sturdy option that is affordable and easy to work with.
- Hardwood: More durable and visually appealing, but typically costs more.
- MDF (Medium Density Fiberboard): An economical option that’s easy to paint or finish.
- Paint or Stain: To finish your bookshelf and match your home decor.
Once you settle on your materials, you’re ready to start building.
How Do You Measure and Plan the Bookshelf?
Before cutting any wood, proper measurements and planning are essential. Here’s how to do it:
-
Choose Your Space: Determine where your small bookshelf will go. Measure the height, width, and depth available.
-
Decide on Dimensions: A typical small bookshelf might be around:
– 24-36 inches tall
– 24-30 inches wide
– 8-12 inches deep -
Sketch Your Design: Draw a simple blueprint. Include the number of shelves and their spacing. A common design includes 2-4 shelves, but feel free to customize.
By taking a few minutes to measure and plan, you set a strong foundation for your project.
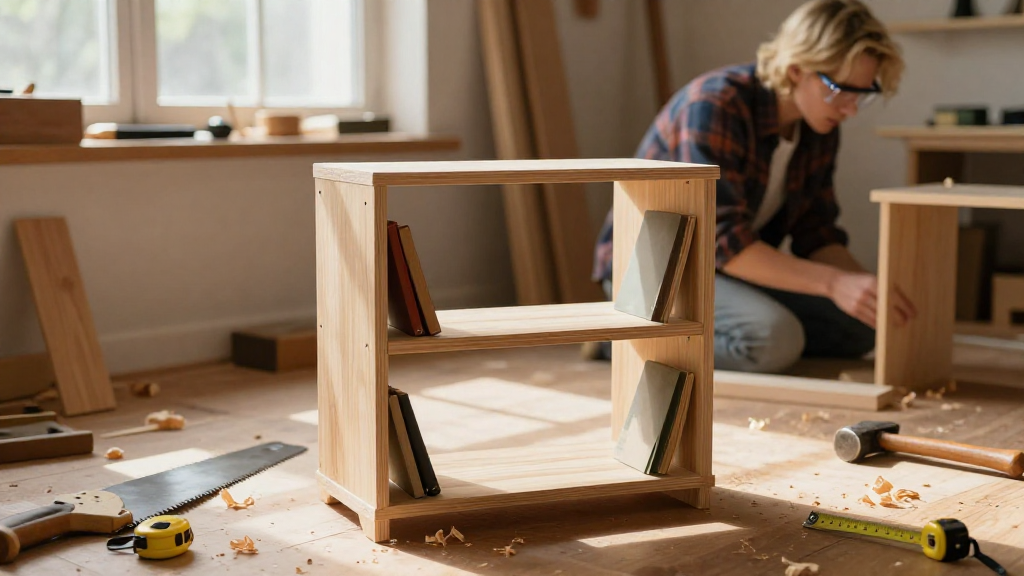
Which Steps Should You Follow to Build a Small Bookshelf?
Now that you have your tools and materials ready, it’s time to learn how to make a small bookshelf step-by-step. Follow these straightforward steps:
Step 1: Cut the Wood
- Measure and mark your wood according to your sketch.
- Use the saw to cut two side pieces, a top shelf, a bottom shelf, and additional shelves as planned.
- Ensure all cuts are straight and clean for a professional look.
Step 2: Sand the Edges
- After cutting, sand all edges and surfaces to remove splinters.
- Start with a coarser grit sandpaper and finish with a finer grit for a smooth surface.
Step 3: Assemble the Bookshelf
- Begin by attaching the top and bottom shelves to the side pieces using screws or wood glue.
- Use a clamp to hold everything in place while it dries if you choose glue.
- Ensure the shelves are level, adjusting as needed.
Step 4: Install Additional Shelves
- Mark where you want your additional shelves to go.
- Drill support holes for adjustable shelves if desired.
- Slide the shelves into place or attach them permanently.
Step 5: Apply Finishing Touches
- Once assembled, wipe the bookshelf down with a damp cloth.
- Apply paint or stain to give it a finished look.
- Let it dry completely before placing books on it.
Following these steps carefully will help you create a sturdy, attractive small bookshelf.
How Can You Decorate Your Small Bookshelf?
Now that you’ve successfully built your bookshelf, let’s think about how to make it stand out. Here are some decoration ideas:
-
Colorful Book Arrangements: Mix and match book colors for an eye-catching display.
-
Personal Items: Incorporate personal mementos or photos to make it uniquely yours.
-
Plants: Add some greenery with potted plants or succulents for a fresh pop of color.
-
Art Pieces: Consider placing small art pieces or sculptures on shelves to break up the symmetry of books.
Decorating your small bookshelf not only enhances its aesthetics but also reflects your personality!
Where Can I Place My Small Bookshelf?
Placement is key to ensuring your new bookshelf shines in your home. Here are some ideal locations:
-
Living Room: As a focal point, especially if surrounded by comfortable seating.
-
Bedroom: For personal reading materials and decor items.
-
Home Office: To keep work-related books and resources organized.
-
Corner Spaces: Utilizing corners can maximize space and create a cozy reading nook.
Choosing the right place can truly elevate the experience of owning a small bookshelf.
What Are Some Common Mistakes to Avoid?
When learning how to make a small bookshelf, beginners often run into a few common pitfalls. Here’s what to watch out for:
-
Incorrect Measurements: Always double-check before cutting material.
-
Skimping on Quality: Use good-quality materials; it makes a difference in durability.
-
Forgetting to Sand: Failing to sand can lead to rough edges and splinters.
-
Neglecting Weight Distribution: Leave heavier items on lower shelves to avoid tipping.
By avoiding these mistakes, you can ensure that your project is a successful and enjoyable experience.
Conclusion
Building a small bookshelf can be a rewarding project that transforms your space while showcasing your personality.
With the right tools, materials, planning, and attention to detail, even beginners can succeed.
From practical steps on how to make a small bookshelf to innovative decoration ideas, you’re well on your way to creating a functional and stylish piece of furniture.
Whether you choose to highlight your favorite novels or display cherished artifacts, your new bookshelf will serve as a testament to your creativity and hard work.
So gather your materials and start a fun woodworking project today!