If you’re wondering how to make box joints, you’ve come to the right place! This woodworking technique is perfect for creating strong, durable joints, ideal for boxes, drawers, and furniture. In this article, we will explore the steps required to make box joints using a jig, along with tips and tricks that will ensure your craftsmanship is top-notch.
What Are Box Joints and Why Use Them?
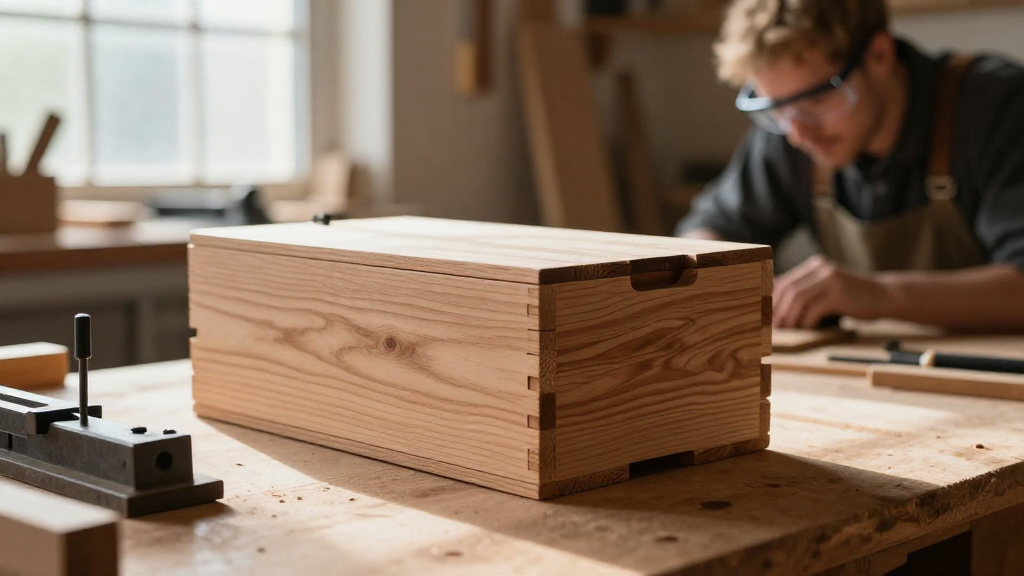
Box joints, also known as finger joints, are a type of woodworking joint that interlocks at right angles. They are praised for several reasons:
- Strength: Box joints provide greater gluing surface area, creating a strong bond.
- Visual Appeal: The repetitive pattern adds an aesthetic charm that can enhance the piece.
- Ease of Creation: While box joints might seem complicated, using a jig can simplify the process significantly.
Understanding how to make box joints can elevate your woodworking projects, making them both sturdy and beautiful.
What Tools Do You Need for Box Joints?
Before you dive into creating box joints, it’s essential to gather your tools. Here are the necessary items:
- Table Saw: A reliable table saw is crucial for precision cuts.
- Jig: A box joint jig is designed specifically for cutting box joints.
- Wood: Choose wood that is suited to your project, typically hardwoods for their durability.
- Glue: Quality wood glue will help bond the joints securely.
- Clamps: These are vital for holding the pieces tightly while the glue dries.
Understanding how to make box joints properly begins with having the right equipment at your fingertips.
How to Build a Box Joint Jig
Step 1: Gather Materials
- Plywood: For the base of the jig.
- Fences: To guide the wood pieces through the cuts.
- Thumb Screws or Bolts: For adjustments.
- Measuring Tape: For accurate measurements.
Step 2: Construct the Base
-
Cut a piece of plywood to a size that can accommodate your table saw.
-
Create a sturdy framework where the wood will rest against. The edges must be square for accurate cuts.
Step 3: Install the Fences
- Attach two vertical fences to the base.
- Ensure they are parallel and have enough space for your wood stock.
Step 4: Add Adjustability
- Use thumb screws or bolts at the ends of the fences for easy adjustment.
- This feature will let you set the distance of the finger cuts accurately.
Step 5: Final Assembly
- Ensure everything is tight and secure.
- Your jig is now ready for making box joints!
With the jig prepared, you can now learn how to make box joints efficiently and effectively.
How to Prepare Your Wood for Box Joints?
Step 1: Measure and Mark
-
Select Your Stock: Based on your project’s design dictates.
-
Measure: Decide the width and depth of your box joints.
-
Mark Your Cuts: Make precise marks on the wood to guide your cuts.
Step 2: Set Up the Jig
- Place your marked wood carefully into the jig.
- Adjust the fence so that the cut will align with your markings.
Step 3: Adjust the Saw Blade
- Set the blade height for the depth of the box joint.
- Ensure the blade angle is perpendicular for straight cuts.
Step 4: Make the Cuts
-
Cut the First Piece: Slowly push the wood through the saw. Ensure it is held firmly against the jig.
-
Cut Subsequent Pieces: Repeat the process for each piece of wood that will be joined.
By following these steps carefully, you will learn how to make box joints cleanly and precisely.
What Are the Best Practices for Joining Box Joints?
1. Dry Fit Before Gluing
- Always perform a dry fit first.
- This step ensures that all joints fit snugly together.
2. Use Good Quality Glue
-
A strong adhesive will enhance the durability of your box joints.
-
Apply glue evenly in the joint area for maximum bonding surface.
3. Clamp Securely
- After applying glue, use clamps to hold the joint together.
- Keep the joint square while the glue dries for optimal strength.
4. Clean Excess Glue
- Wipe off any excess glue that seeps out from the joints.
- This will give a professional finish to your project.
Adhering to these best practices will go a long way toward ensuring your success in how to make box joints that last.
How to Finish Your Box Joint Projects?
Step 1: Sand the Edges
- Once your glue has dried, sand the edges.
- This helps in removing any sharp edges and achieving a smooth finish.
Step 2: Apply Stain or Paint
- Choose a color that enhances your project’s aesthetic.
- Applying a finish protects the wood and adds to its beauty.
Step 3: Final Inspection
- Check your joints for gaps and ensure everything is tight.
- An excellent final inspection can save troubleshooting in the future.
Conclusion
Now that you understand how to make box joints, you’re equipped to add a skill that will significantly enhance your woodworking projects.
Having a robust jig is crucial for achieving consistent results.
With the right techniques and tools, you’ll find that box joints can be both a simple and rewarding joint to work with.
So get out your tools, gather your materials, and start crafting those strong box joints today!
By applying the tips and steps discussed here, your woodworking will reach new heights.
Happy woodworking!