Are you looking to maximize efficiency in your workshop? Learning how to build a clamp storage rack can be a game-changer.
Whether you’re a seasoned woodworker or a DIY enthusiast, a clamp storage rack is essential for keeping your workspace organized and your tools easily accessible.
Why Should I Build a Clamp Storage Rack?
A clamp storage rack offers numerous benefits that can enhance your workflow.
- Organization: Keeping clamps in one designated area reduces clutter.
- Easy Access: You’ll spend less time searching for the right tool.
- Space Saving: Utilizing vertical space maximizes your workshop’s capacity.
- Prolongs Clamp Life: Proper storage helps avoid damage.
Building a clamp storage rack is an effective solution for ensuring these benefits in your workshop.
What Materials Do I Need?
Gathering the right materials is the first step in how to build a clamp storage rack.
Here’s a comprehensive list:
- Plywood or MDF: For the main structure.
- Wood Screws: To secure the assembly.
- Wood Glue: For additional strength.
- Clamps: To hold pieces while assembling.
- Sandpaper: For smoothing edges.
- Paint or Finish: Optional, for aesthetics and protection.
Make sure to also have basic tools like a saw, drill, and a level ready for use.
How Should I Design My Clamp Storage Rack?
What Size Should the Rack Be?
The size of your clamp storage rack will depend on the number and types of clamps you own.
Consider the following:
- Types of Clamps:
- Bar clamps
- Pipe clamps
-
Spring clamps
-
Quantity:
-
Plan for the current clamps you own as well as a few extra slots for future additions.
-
Available Space:
- Measure the wall space where you intend to mount the rack.
A typical design might be around 4 feet tall and 2 feet wide, providing ample storage for a variety of clamps.
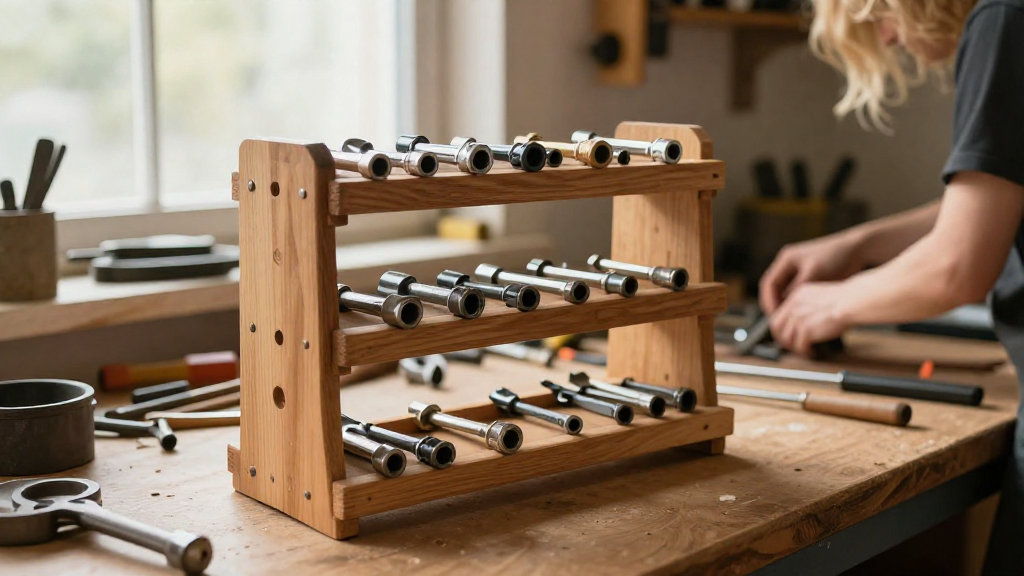
What Should the Rack Look Like?
You can build a simple vertical rack that consists of horizontal slots for each clamp type.
You may also want to incorporate:
- Hinged Storage: A place for smaller clamping tools or accessories.
- Hooks: For quick access to frequently used clamps.
How Do I Build the Clamp Storage Rack?
Step 1: Cut Your Materials
With your design finalized, start by cutting your plywood or MDF to the appropriate dimensions.
Common dimensions for a standard rack are:
- Top Shelf Length: 48 inches
- Shelf Height: 4-6 inches apart for easy access
Ensure all cuts are straight using a circular or table saw for best results.
Step 2: Assemble the Parts
Begin assembly by following these steps:
- Lay Out the Base: Start with the bottom piece of plywood as a solid foundation.
- Secure the Vertical Supports: Attach two vertical pieces on either end of the base using screws and wood glue, making sure they are perfectly vertical.
- Install Horizontal Shelves: Attach the horizontal shelves at the desired heights. Use a level to ensure they’re straight.
- Reinforce the Structure: Add diagonal supports on the back for stability.
Step 3: Finish the Rack
Once assembled, use sandpaper to smooth out any rough edges. Applying a finish or paint can protect the wood and enhance the overall look of your workshop.
Step 4: Mount the Rack
Using wall anchors if necessary, mount your rack securely to the wall.
Make sure it’s at a convenient height for you to reach all the clamps easily.
How Do I Organize My Clamps on the Storage Rack?
Once your clamp storage rack is complete, it’s time to load it up!
Here’s how to organize your clamps effectively:
- By Size: Place smaller clamps towards the bottom and larger ones on top.
- By Type: Group similar clamps together for easy identification.
- Handy Hooks: Use hooks for frequently used tools for quick access.
Bonus Tip: Label sections if you have a larger variety of clamps.
What Maintenance Does My Clamp Storage Rack Need?
After investing time in building a clamp storage rack, maintaining it is essential for longevity.
Keep in mind:
- Inspect for Loose Screws: Regularly check and tighten screws as needed.
- Clean Regularly: Dust and debris can accumulate; a quick wipe will keep it looking nice.
- Reorganize as Necessary: As your collection grows, be willing to adjust the setup for optimal efficiency.
Conclusion
In conclusion, knowing how to build a clamp storage rack is an invaluable skill for any workshop enthusiast.
With the right materials and design considerations, you will create a structure that not only meets your needs but enhances your workspace.
So gather your materials, follow the steps outlined above, and enjoy a more organized, efficient workshop!
Now that you’ve learned how to create your own clamp storage rack, you’re one step closer to a more efficient, organized workspace!