Are you ready to tackle a DIY project that combines functionality and creativity?
With a tool caddy woodworking plan, you can create a portable tool caddy that makes transporting your essential tools a breeze.
In this article, we will guide you through the process of building a tool caddy using a simple plan, making it a perfect project for both beginners and seasoned woodworkers.
What is a Tool Caddy?
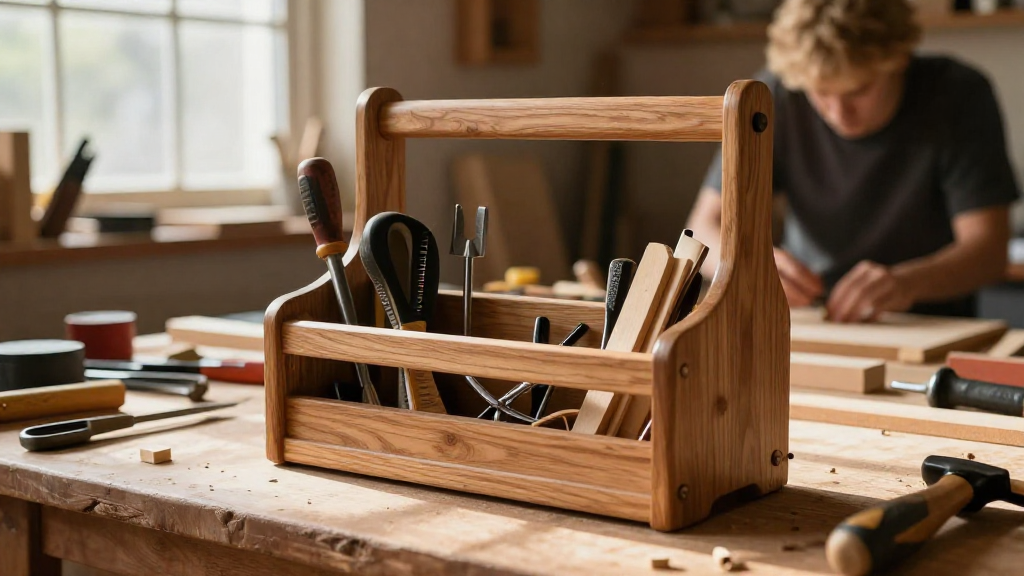
A tool caddy is essentially a portable container designed to hold your tools and equipment.
This handy accessory is perfect for those who need to move their tools around frequently, whether it’s from room to room in your home, to a worksite, or for DIY projects in the garage.
Why Should You Build a Tool Caddy?
Building your own tool caddy woodworking plan has several advantages:
-
Customization: You can tailor the caddy to your specific needs, making it the perfect size and style for your tools.
-
Cost-Effective: Creating your own tool caddy is often cheaper than purchasing one from a store.
-
Skill Development: It’s a fantastic way to improve your woodworking skills and gain hands-on experience.
-
Sustainable: You can use reclaimed or leftover wood, making this project environmentally friendly.
With these benefits in mind, let’s dive into how you can build a portable tool caddy with ease!
What Materials Do You Need?
Before you start your project, gather the following materials:
- Wood: Choose a durable wood like pine or plywood. You’ll need a few boards with the following dimensions:
- 1 piece of 1” x 10” x 24” for the bottom
- 2 pieces of 1” x 10” x 12” for the sides
- 2 pieces of 1” x 10” x 10” for the ends
- 1 piece of 1” x 4” x 24” for the handle
- Screws: Use 1.25” wood screws for assembly.
- Wood Glue: For added strength, especially for joints.
- Sandpaper: A variety of grits will help smooth the wood surface.
- Wood Finish or Paint (optional): This will protect your caddy and give it a personal touch.
Tools You Will Need
Make sure you have the following tools handy:
- Drill
- Saw (circular or hand saw)
- Screwdriver
- Clamps
- Measuring Tape
- Square
How Do You Create a Simple Plan?
Step 1: Cut the Wood to Size
Using your measuring tape and saw, cut the wood pieces according to the dimensions listed above.
- Make sure to double-check your measurements for accuracy.
Step 2: Assemble the Bottom
Take the base piece (1” x 10” x 24”) and lay it flat.
Attach the side pieces (1” x 10” x 12”) to the longer edges of the base.
- Pre-drill holes for the screws to avoid splitting the wood.
Secure them in place with wood glue and screws.
Step 3: Attach the End Pieces
Now, attach the end pieces (1” x 10” x 10”) to the sides to form the sides of the caddy.
- Again, use wood glue for strength and pre-drilled holes for the screws.
Step 4: Add the Handle
Using the piece of wood for the handle (1” x 4” x 24”), cut and sand it to your desired shape.
Attach it to the top center of the ends to create a comfortable carrying handle.
- Ensure that it’s firmly attached and can support the weight of the tools.
Step 5: Sand Everything Smooth
Using your sandpaper, sand down all surfaces.
- This will eliminate splinters and rough edges, making it safe to handle.
Step 6: Finish Your Tool Caddy
At this point, you can choose to apply a wood finish, stain, or paint to your caddy.
- This step adds aesthetics and protects the wood from wear and tear.
How Do You Optimize Your Tool Caddy for Use?
Consider Internal Organization
To keep your tools secure and easy to find, think about adding compartments:
-
Custom dividers: You can create small compartments using leftover wood.
-
Baskets or containers: Consider using small baskets or plastic containers to keep smaller items like screws and nails organized.
Ensure Accessibility
When building your tool caddy woodworking plan, ensure that frequently used tools are easily accessible.
- Place these tools in the sections of the caddy that are easiest to reach, allowing for quick access.
How Do You Maintain Your Tool Caddy?
Once you’ve built your portable tool caddy, maintenance is key:
-
Regularly inspect for any loose screws or damage.
-
Clean the caddy regularly to prevent dust accumulation.
-
Reapply finish or paint as needed, especially if you notice wear over time.
Conclusion: Why Create Your Own Tool Caddy?
Building a tool caddy woodworking plan is a rewarding project that not only provides you with a functional tool carrier but also enhances your woodworking skills.
The ability to customize your tool caddy to fit your unique needs allows you to work more efficiently and keep your workspace organized.
With the tools and materials at your disposal, you can become more adept at woodworking while creating something you’ll use for years to come.
So, what are you waiting for? Gather your materials, follow this simple plan, and start crafting your own portable tool caddy today!
Happy woodworking!